
Removing the Filament
To remove the filament (e.g. so that you can use a different material for the next print), take these steps:
- Press the control wheel to call up the menu.
- Spin the wheel to select the Control option, then press the wheel to confirm.
- In the next menu, use the Unload Filament option.
- The print head will begin to heat up, and then a small amount of material will be extruded and then quickly retracted. To verify this, check the filament inside the Bowden cable—its end will be roughly in the position shown in the photo here.

With the thumb and the forefinger of one hand, grasp the extruder’s insertion mechanism in the way shown in the photo.
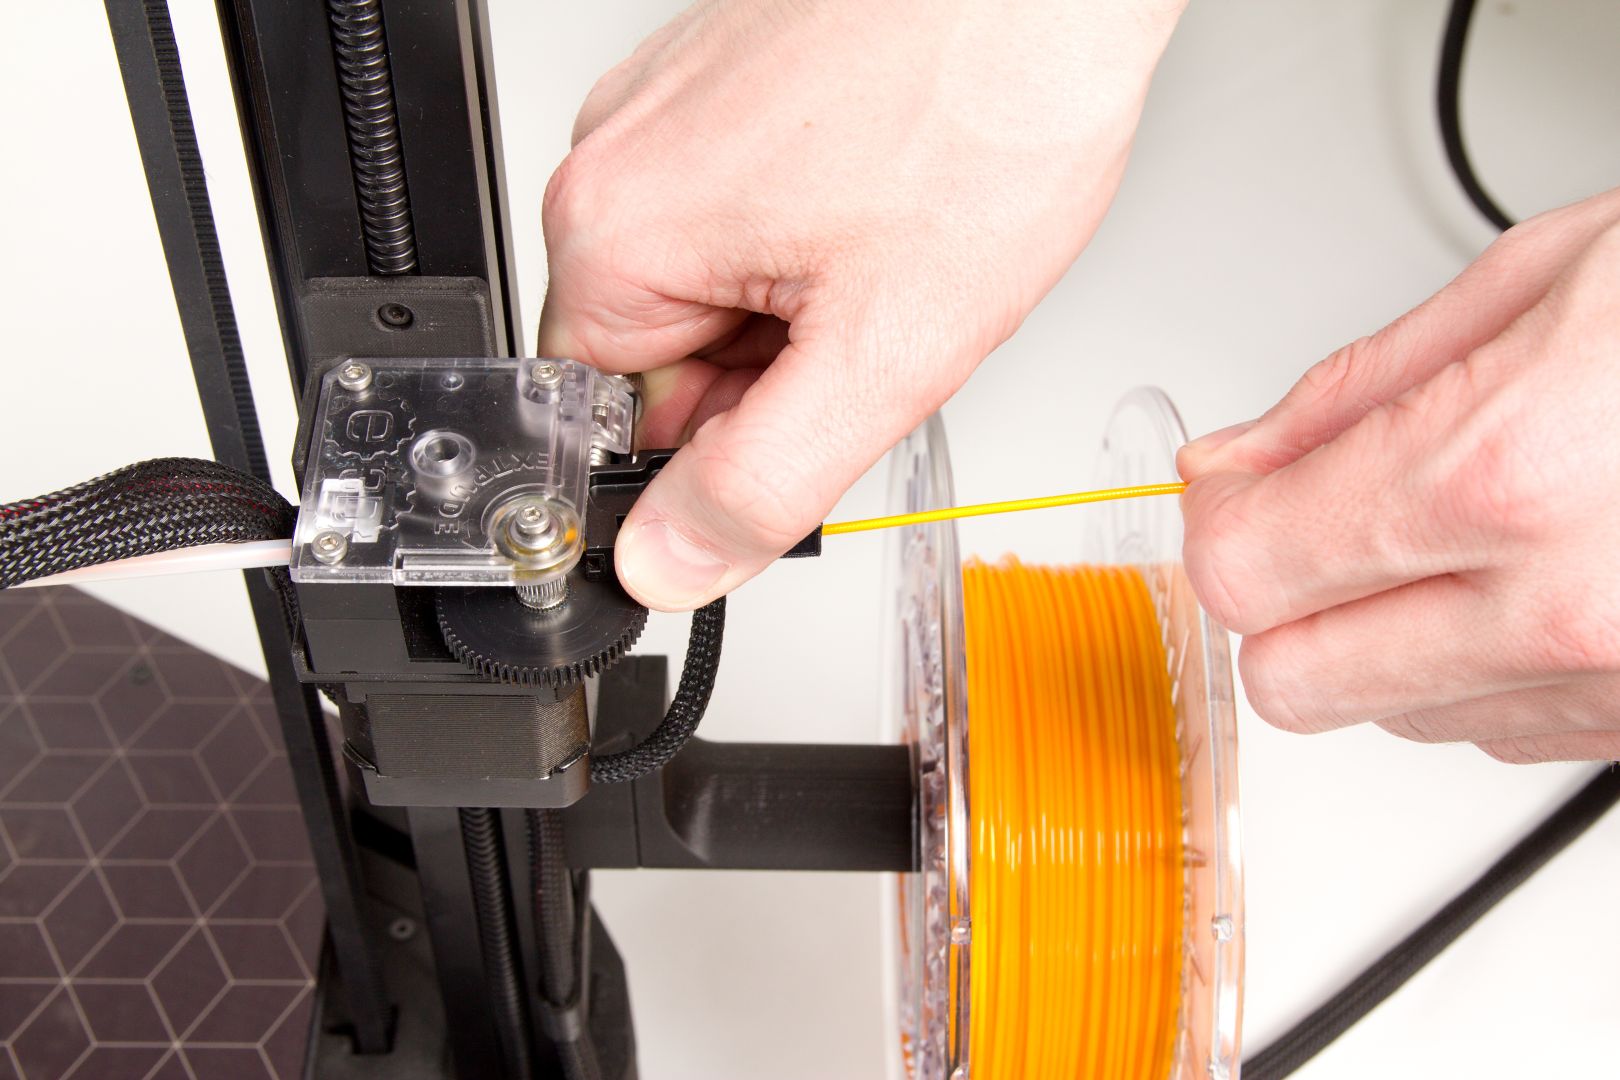
By pressing the spring-loaded insertion mechanism while repeatedly tugging the filament out, remove the filament from the Bowden cable. Don’t forget to gradually wind the filament back onto the reel.
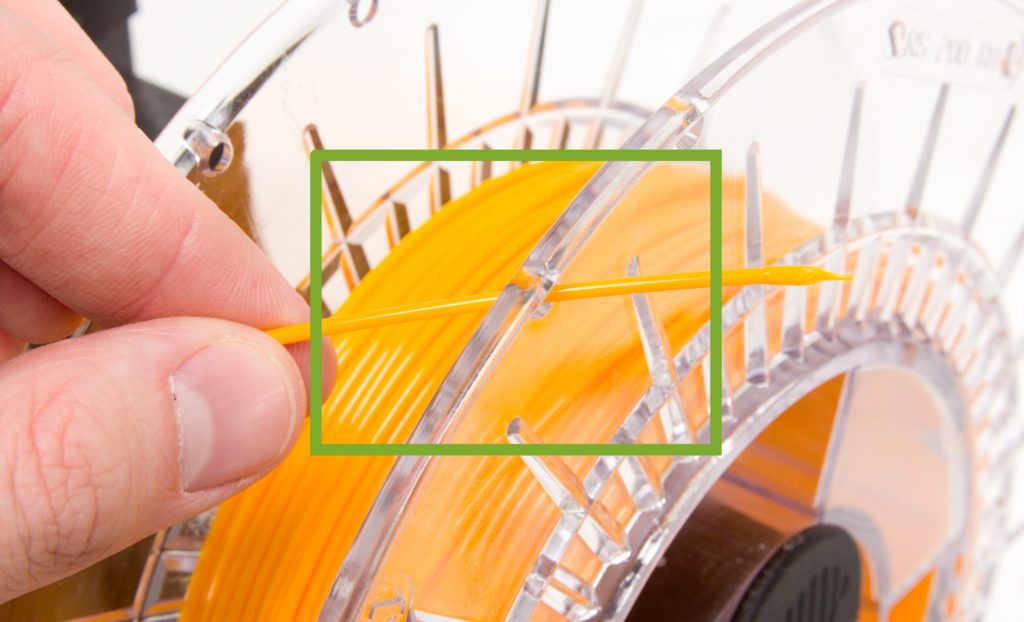
The end of the filament must not be released at any time during this process. After the end of the filament has been pulled out, place it safely into the reel openings.
Exchanging the Filament During Printing
Use this procedure to exchange the filament during an ongoing print job.
- During printing, press the control wheel to call up the menu.
- Spin the wheel to select the Change Filament option, then press the wheel to confirm.
- Use Unload Filament in the next menu.
- After you press the wheel, the print head rides away to a safe distance above the model, and the printer begins to remove the filament (proceed here using the steps in Removing the Filament).
- Insert the new material using the steps in the Inserting the Filament chapter, but this time lead the filament into the Bowden Cable along its full length, up to the print head. So lead the filament all the way to the first point of resistance (where the filament bumps into the nozzle).
- Now use the printer’s control wheel: rotate it counterclockwise to rinse the nozzle with the new material.
- Press in on the dial to renew printing. While the print head is riding back to the model, sharply tear away the filament that was extruded during the exchange. Use this procedure to ensure that this filament will not contaminate the model.
Running out of Filament and How to Insert a New Filament
During printing, the filament sensor can register that the current filament is running out. In that situation, printing stops and the print head rides away from the model and prepares the filament for exchanging, similarly as in the Removing the Filament procedure. With one difference: here the print head begins to cool down.
- Following the Removing the Filament steps, pull out the remainder of the filament.
- Now press the control wheel to confirm that the printer can begin heating the nozzle again.
- Manually insert the new filament as described in the second part of Exchanging the Filament During Printing (lead the filament into the print head until you feel the first sign of resistance).
- Similarly as in the Exchanging the Filament procedure, turn the control wheel counterclockwise to rinse the nozzle with the new filament.
- Press the control wheel. Printing will continue. Similarly as in the Exchanging the Filament procedure, sharply tear away the extruded filament as the print head is riding back towards the model.
First layer height adjustment
A properly set and tuned first layer is one of the keys for successful printing. In order to simplify as much as possible in normal operation, we have equipped our printers with an autoleveling automatic calibration and alignment probe. The probe responds contactlessly and very precisely to the presence of metal. Because the print pad is made of a solid aluminum sheet, it is ideal for this use.
In order for the Auto Calibration and Autolevel function to function properly, it is necessary for the printer to have accurate nozzle tip distance from the pad at the moment the probe closes. This distance is called “Z probe height” and remains unchanged until we move the induction probe, for example during maintenance or through the nozzle, for example, when replacing it.
Z probe height calibration – complete process
- Make sure that the print head is loaded with PLA material and that the print head is cooled down.
- Prepare the print bed according to the Preparing the Print Bed chapter.
- Press the control wheel and move the cursor to the Control menu and then press again to access the submenu.
- In the Control menu make sure that “Z probe hgt.” value is zero. If not, press the control wheel, set the zero and press again to confirm.
- In the menu Control -> Service select Z home calib, the printer will heat up the print bed and will calibrate itself.
- Start the print of the file DQL_50x50mm_plate.gcode (the file name can differ, depending on your printer).
- The printer will auto-level itself, then the print head will be heated up and the printer will initiate the cleaning procedure at the front of print bead. Notice how high above the print bead is the fillament extruded – that is the effect of zeroed Z probe height.
- As soon as the nozzle starts to move, you can find the Z Baby Stepping item in the menu (access it by pressing the control wheel) and press the wheel to move the Z-axis nozzle manually in real time. Negative value of Z Baby Stepping means the nozzle moves closer to the bed, the positive value means nozzle away from the bed. At this moment, move the nozzle closer to the pad.
- Visually validate the current nozzle position and adjust the Z Baby stepping value until the height of the first layer is optimal. To find the optimal value, you have enough time to complete the first layer. If you do not, nothing happens. Simply stop the print using the reset button, clean the bed and start from the beginning.
- Make a note of the current value of Z baby stepping, in our case -0.78mm (your value will be different). In any case, it should be negative.
- Use the reset button to stop printing, you do not have to wait for it to finish.
- In the Control submenu, select Z probe hgt. and adjust the value as follows – if the optimum value of -0.78mm was set in step 9), set Z probe hgt. to +0.78mm. It’s only a reverse of the sign, the value remains the same. Confirmation will save the value.
- Select Z home calib. in the Control -> Service menu, the printer will heat the print pad and calibrate it.
- Congratulations, you just finished calibrating the Z probe height distance.
- Now you can run the print 50x50mm_plate.gcode file from the SD card again and visually verify that the calibration is OK.
Z probe height calibration – modifying current value
Tip: The simplest procedure is to reset the Z probe hgt. to zero and follow the instructions above
- Make sure that the print head is loaded with PLA material and that the print head is cooled down.
- Prepare the print bed according to the Preparing the Print Bed chapter.
- In the Control menu, find the item “Z probe hgt.” and note its default value. For this purpose, we will use a default value of 0.78mm, your value will vary.
- In the menu Control -> Service select Z home calib, the printer will heat up the print bed and will calibrate itself.
- Start the print of the file DQL_50x50mm_plate.gcode (the file name can differ, depending on your printer).
- The printer will auto-level itself, then the print head will be heated up and the printer will initiate the cleaning procedure at the front of print bead.
- As soon as the nozzle starts to move, you can find the Z Baby Stepping item in the menu (access it by pressing the control wheel) and press the wheel to move the Z-axis nozzle manually in real time. Negative value of Z Baby Stepping means the nozzle moves closer to the bed, the positive value means nozzle away from the bed. At this moment, move the nozzle closer to the pad.
- Visually validate the current nozzle position and adjust the Z Baby stepping value until the height of the first layer is optimal. To find the optimal value, you have enough time to complete the first layer. If you do not, nothing happens. Simply stop the print using the reset button, clean the bed and start from the beginning.
- Write down the current Z Baby Stepping value you used to edit. For example, in this case, the first layer was too low, so we needed to increase the value, and in the Z Baby stepping we set + 0.16mm (your value will be different).
- Use the reset button to stop printing, you do not have to wait for it to finish.
- In the Control menu, select Home All, the print head moves to the home position.
- In the Control menu, select “Z probe hgt.” and adjust the value as follows:
- Default value – (measured value) = new value
- i.e. 0.78 mm – (+0.16 mm) = 0.78 – 0.16 = 0.62 mm
- confirm the new value
- Select Z home calib. in the Control -> Service menu, the printer will heat the print pad and calibrate it.
- Congratulations, you just finished editing the Z probe height calibration.
- Now you can run the print 50x50mm_plate.gcode file from the SD card again and visually verify that the calibration is OK.
TIP: If you notice that the first layer is too high and should be lowered and the Z Baby stepping value would be -0.12mm, the adjustment procedure would be as follows:
Default value – (measured value) = new value, i.e. 0.78 mm – (-0.12 mm) = 0.78 + 0.12 = 0.9 mm
Save the new value with the confirmation and follow the steps above.
Exchanging the Nozzle
Use this procedure to exchange the nozzle:
- Remove the blue silicon cover. Pay close attention to the wires leading out of the aluminum block (the heat block).
- Perform the Removing the Filament procedure. The rest of the procedure is performed with the nozzle already heated up.
- Grip the aluminum block (the heat block) with pliers (not included with the printer) to firmly fix it in place.
- Using the torque wrench included with the printer, loosen the nozzle (by turning it counterclockwise).
- Using that same wrench, screw the new nozzle into the aluminum block (hold the block firm within the pliers).
- Perform a printer reset or cooldown using the menu.
- Put the silicon cover back onto the print head.
- Press the control wheel and use the Control item in the menu.
- In the Control menu, use the Service Menu item.
- Here, turn the wheel to select the PID Tuning item.
- The printer will perform a temperature test, during which it will repeatedly heat up the nozzle in the range from 200 °C to 210 °C to calibrate the nozzle heating.
Relocating the Printer
Thanks to this printer’s sturdy design, it is easy to relocate—in your arms or in a car. Always secure the anti-shifting belts during this process, using the three plastic catches (see Steps Needed After Positioning the Printer). After moving and unpacking the printer (while following the steps in this manual), don’t forget to always perform Z-axis calibration (the Z-axis Calibration chapter).
Back: Your first print
Next: Troubleshooting