Now that the printer is ready, there’s nothing stopping you from getting started with printing. You can use this part of the guide at any time in the future when you want a reminder of the right way to proceed when printing.
Inserting the Filament
1) Remove the spool from the package and place it on the spool holder. The end of the filament is still fixed in the spool at the moment.
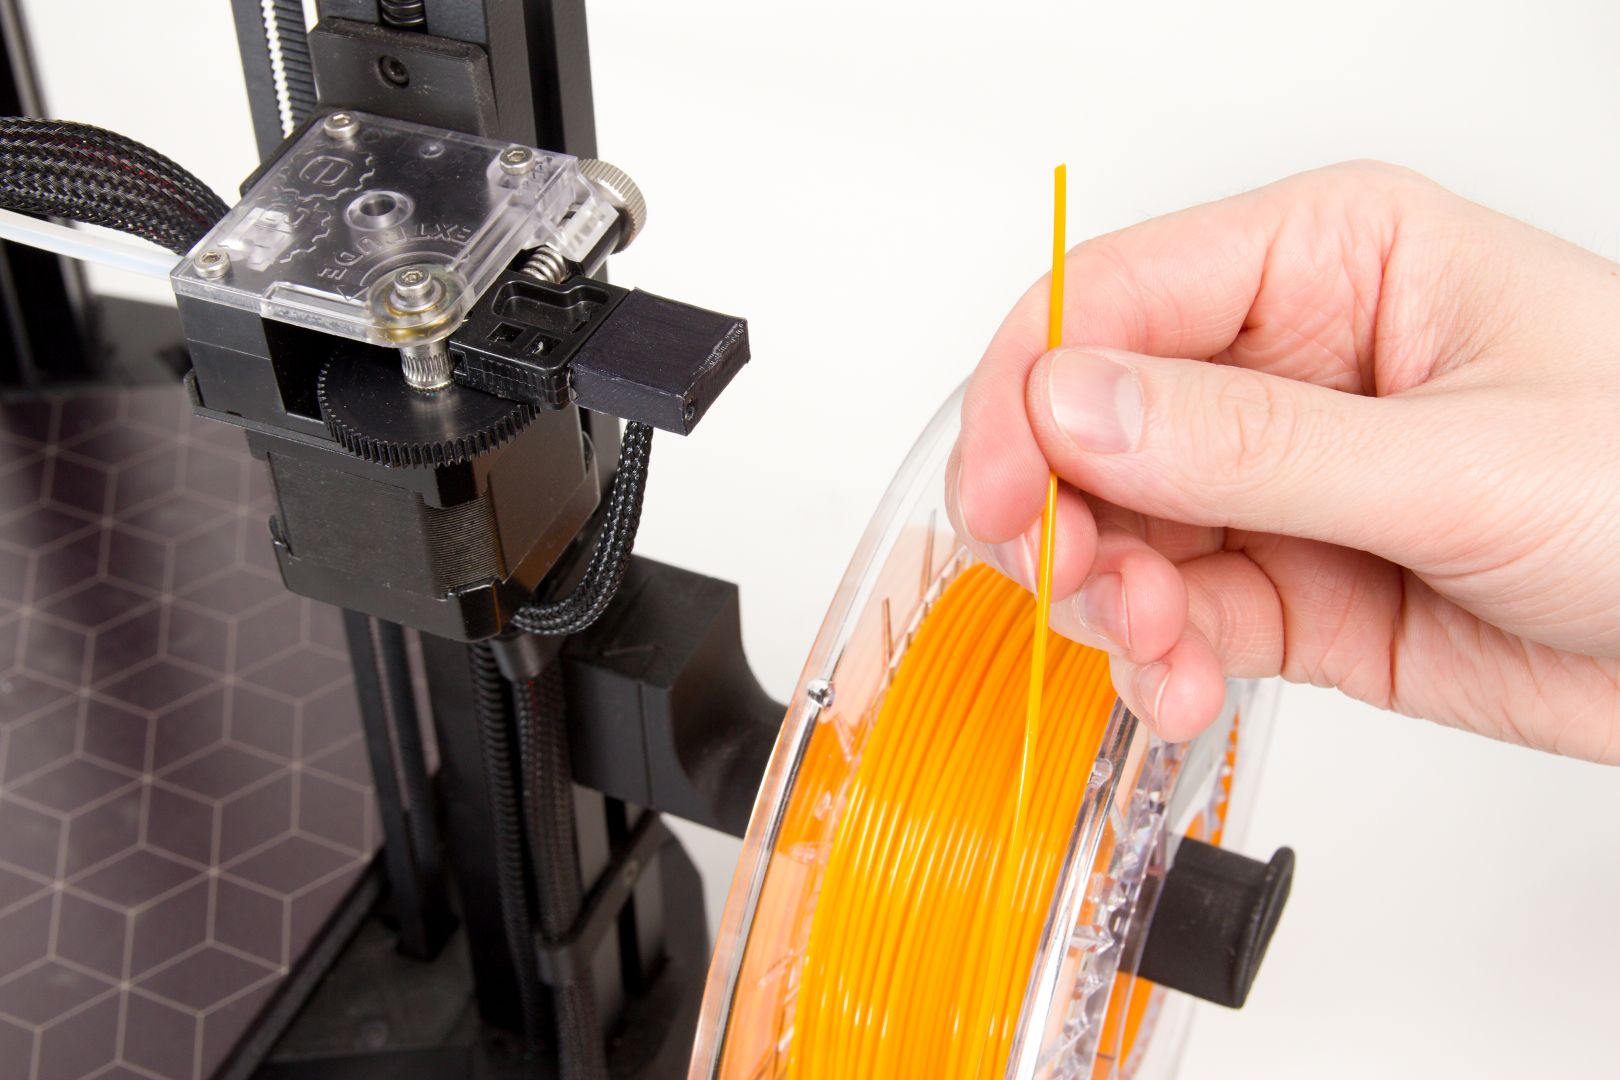
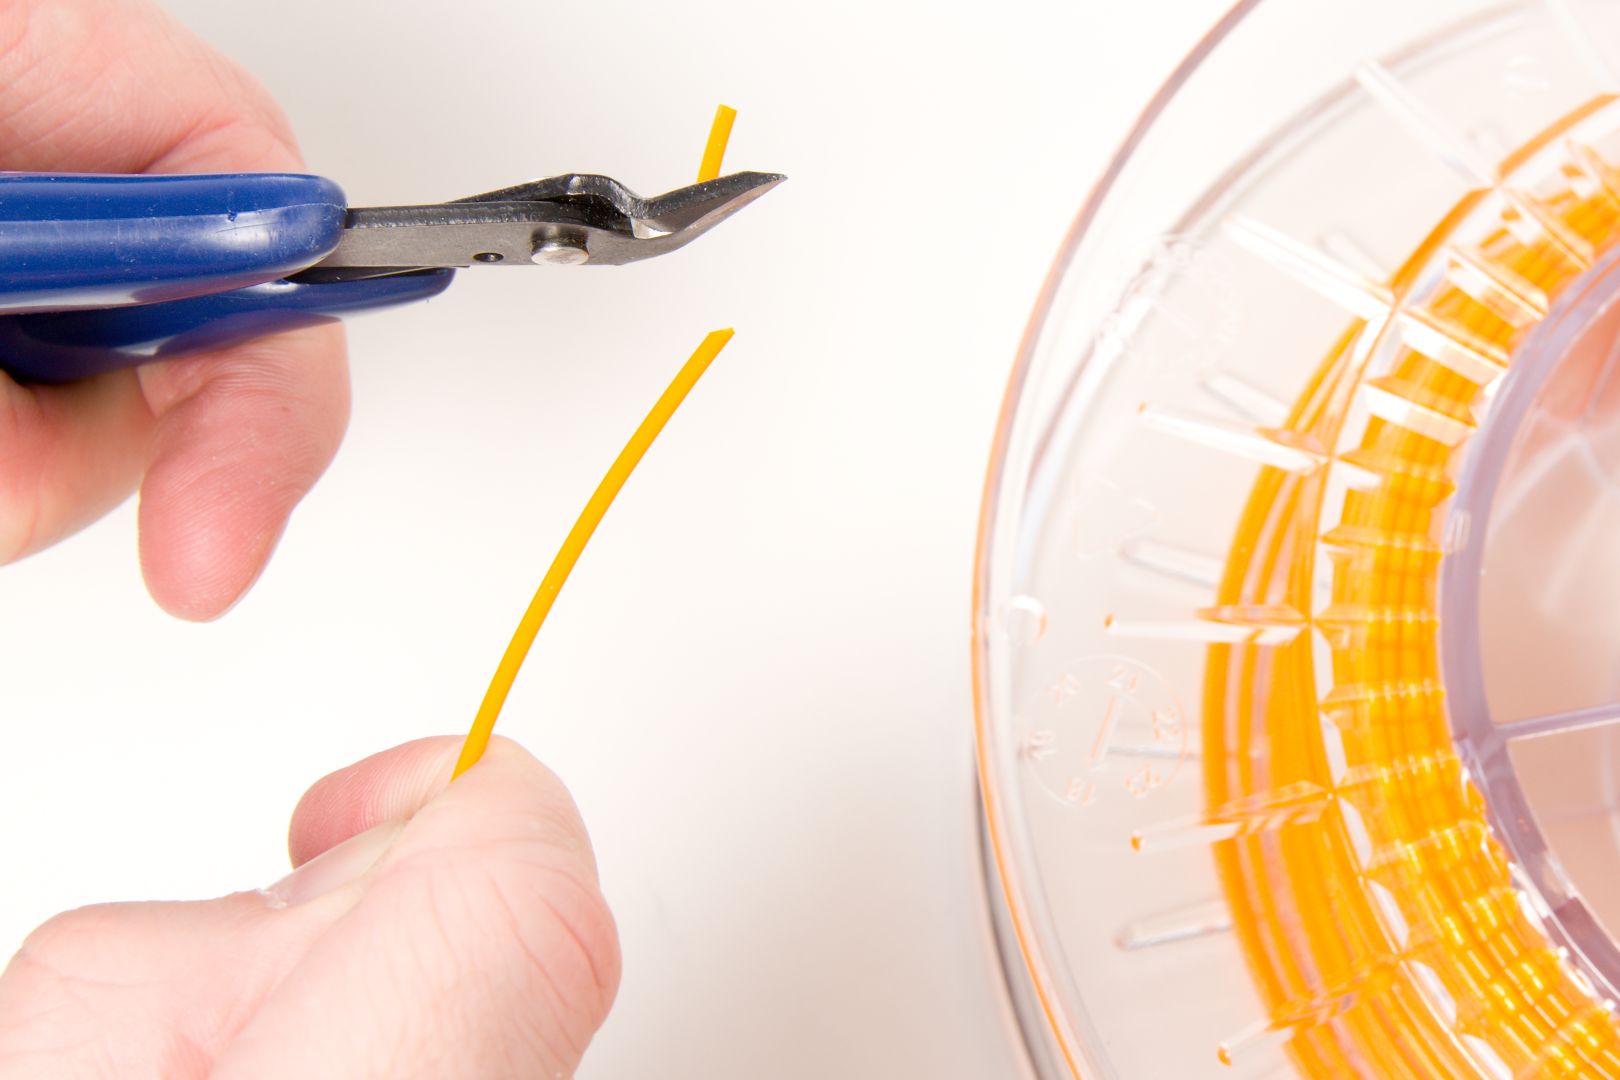
2) Remove the filament from the side of the spool and cut the filament at about 45° using the supplied pliers.
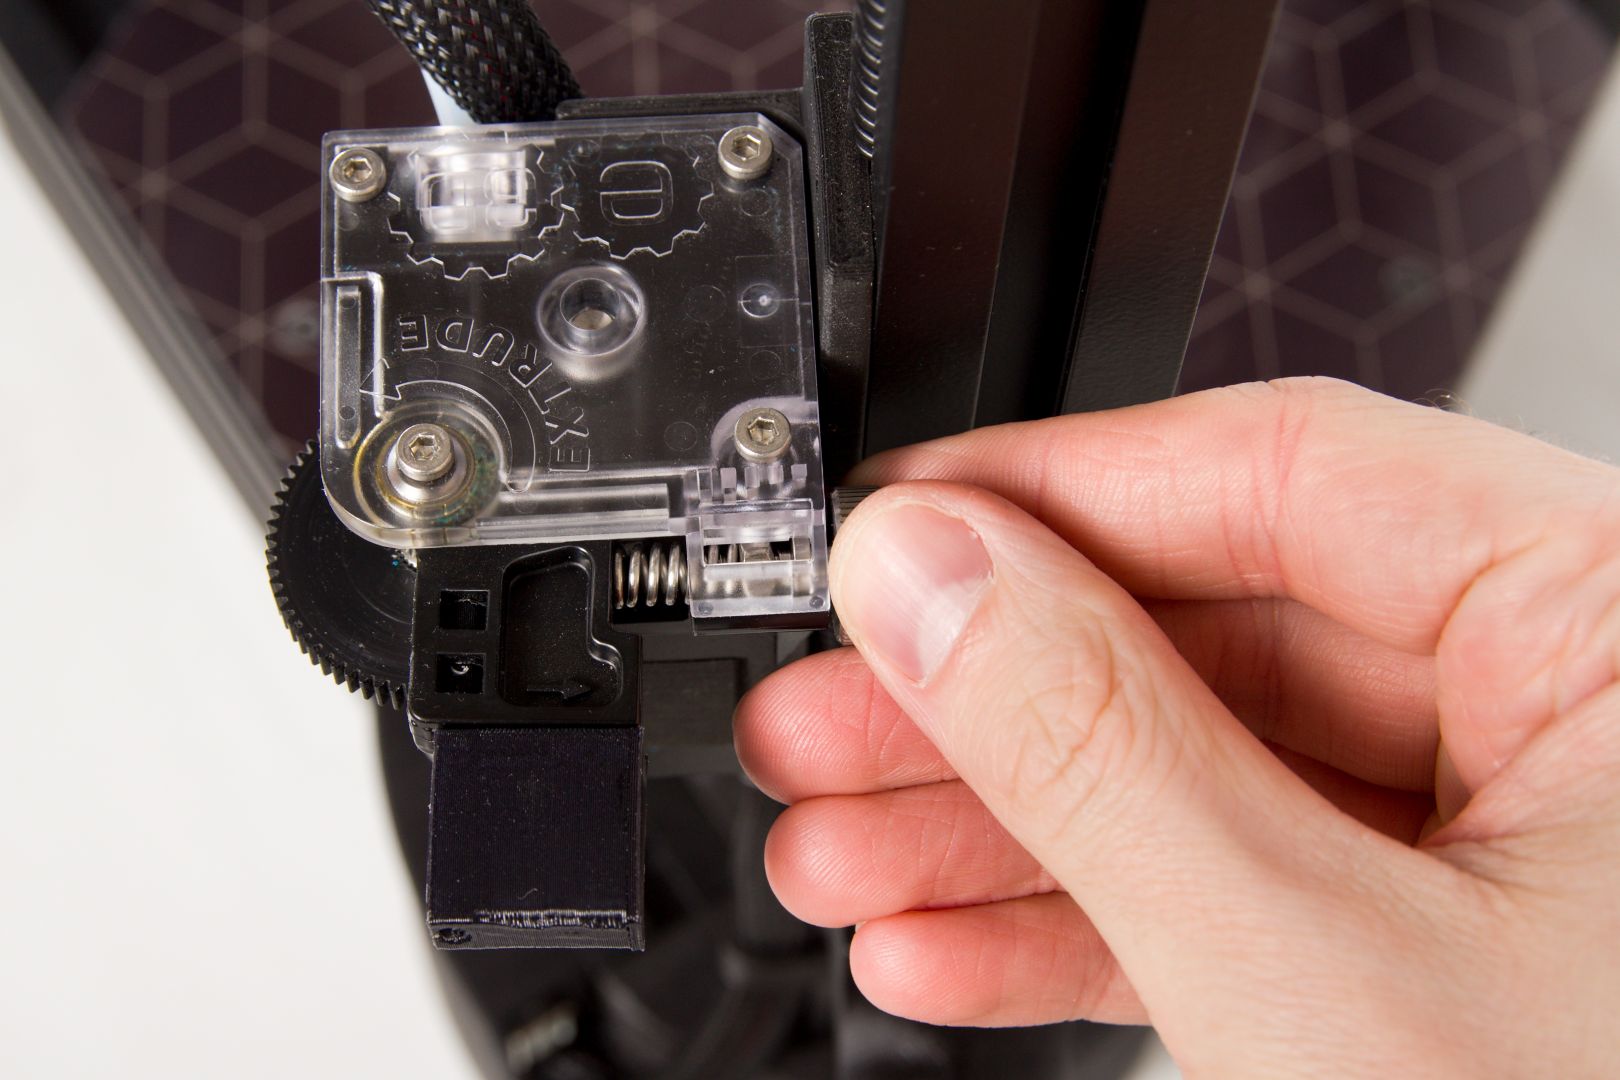
3) Press the marked spots on the extruder against each other with your pointer finger and the thumb of your other hand. This makes it easy to then lead the filament in around the feeder wheel.
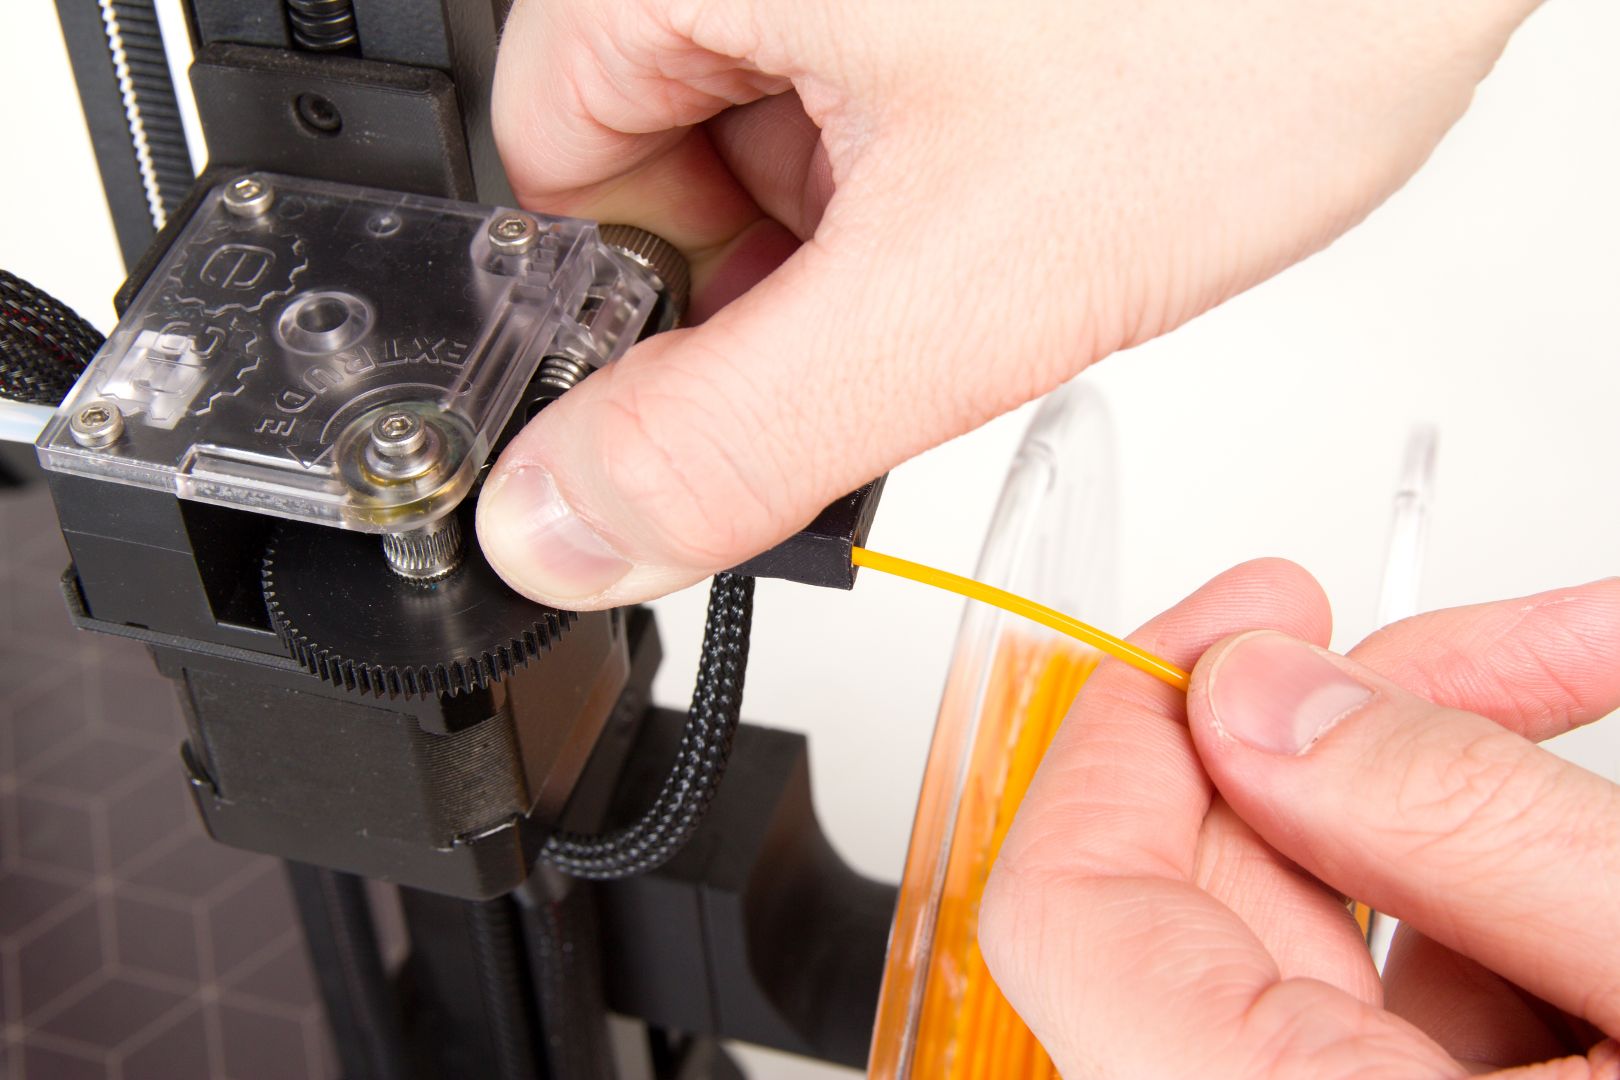
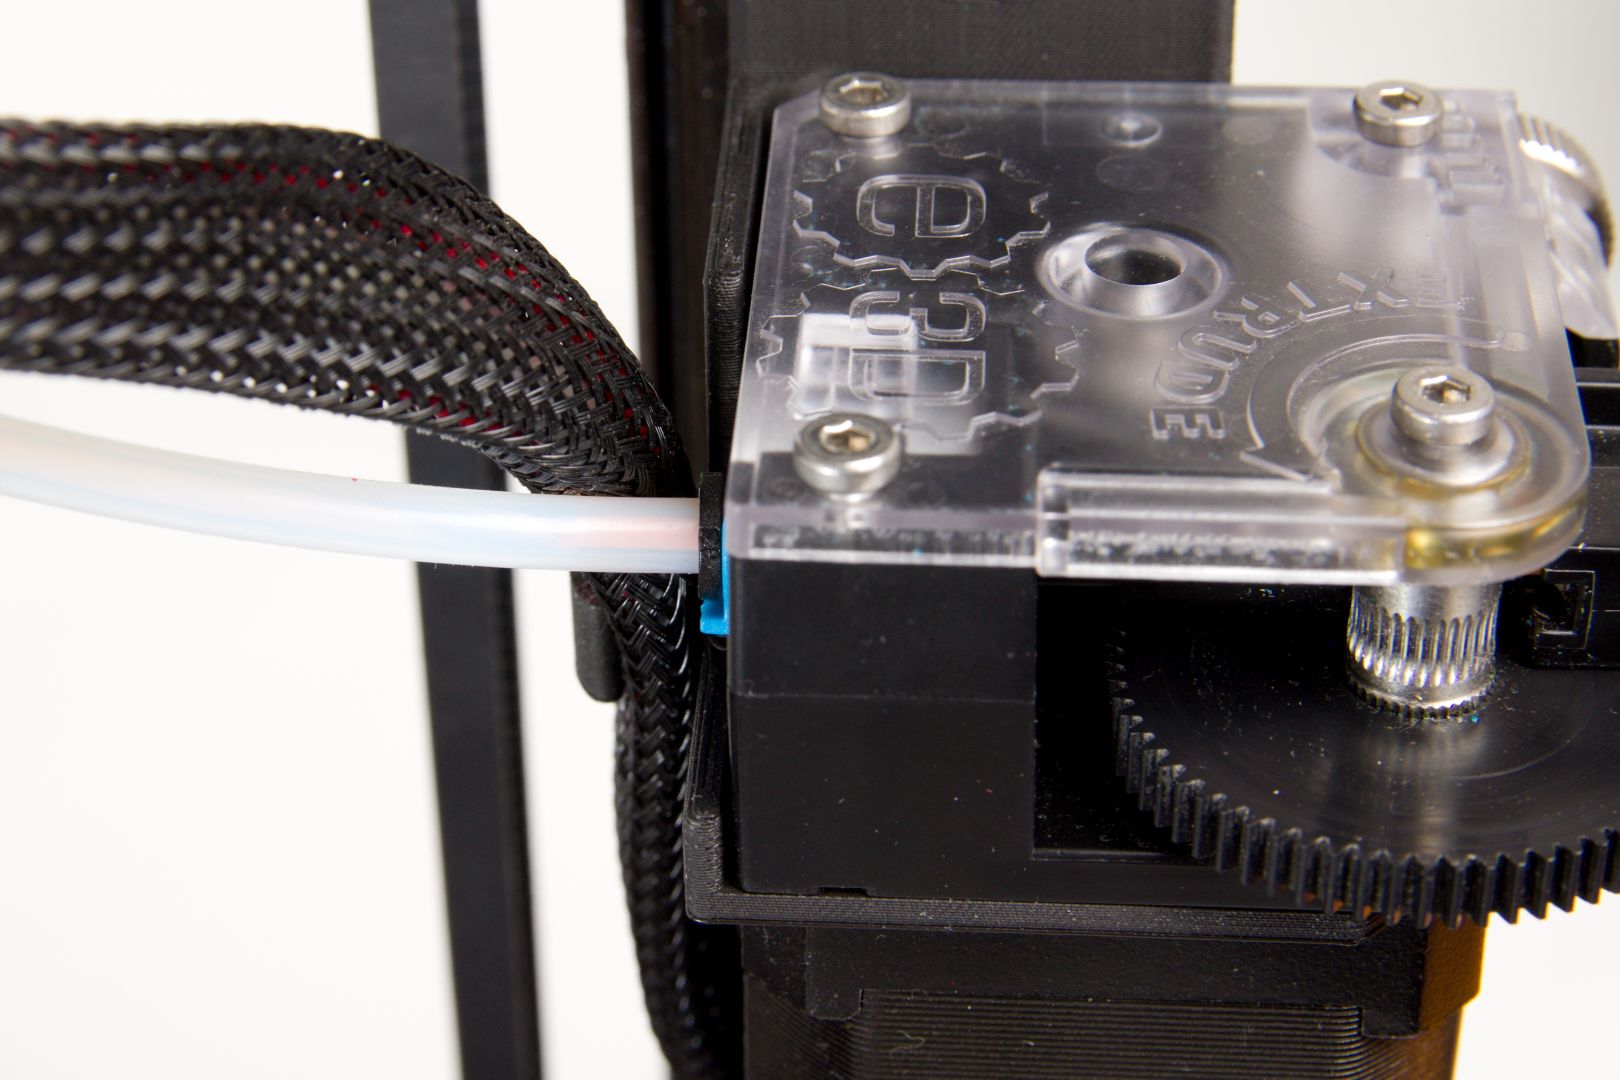
4) Lead the end of the filament through the filament sensor into the extruder.
5) The end of the filament is now visible inside the transparent Bowden cable. Once you see about one centimeter of filament in the tube, release the grip of your other hand; the filament is now ready for automatic feeding using the printer menu.
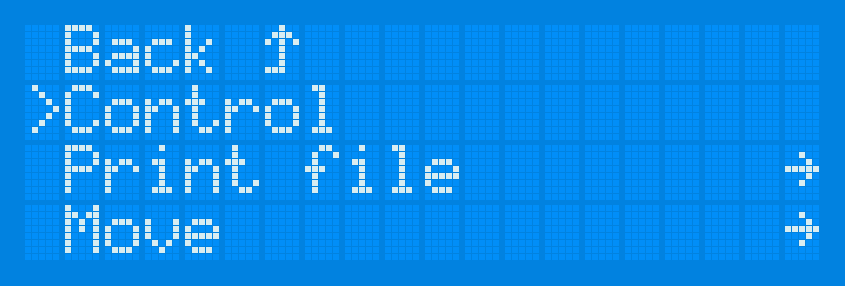
6) Press the wheel next to the display to show the menu, and then use the Control item (again by pressing the wheel).
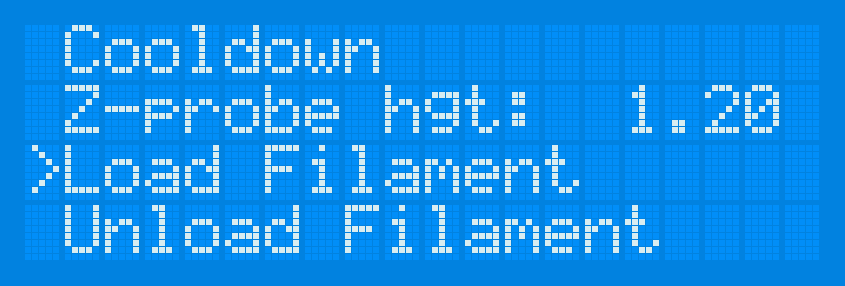
7) Here, select the Load Filament item and press the wheel to confirm.
8) The printer will begin heating the print head and will then lead in the filament.
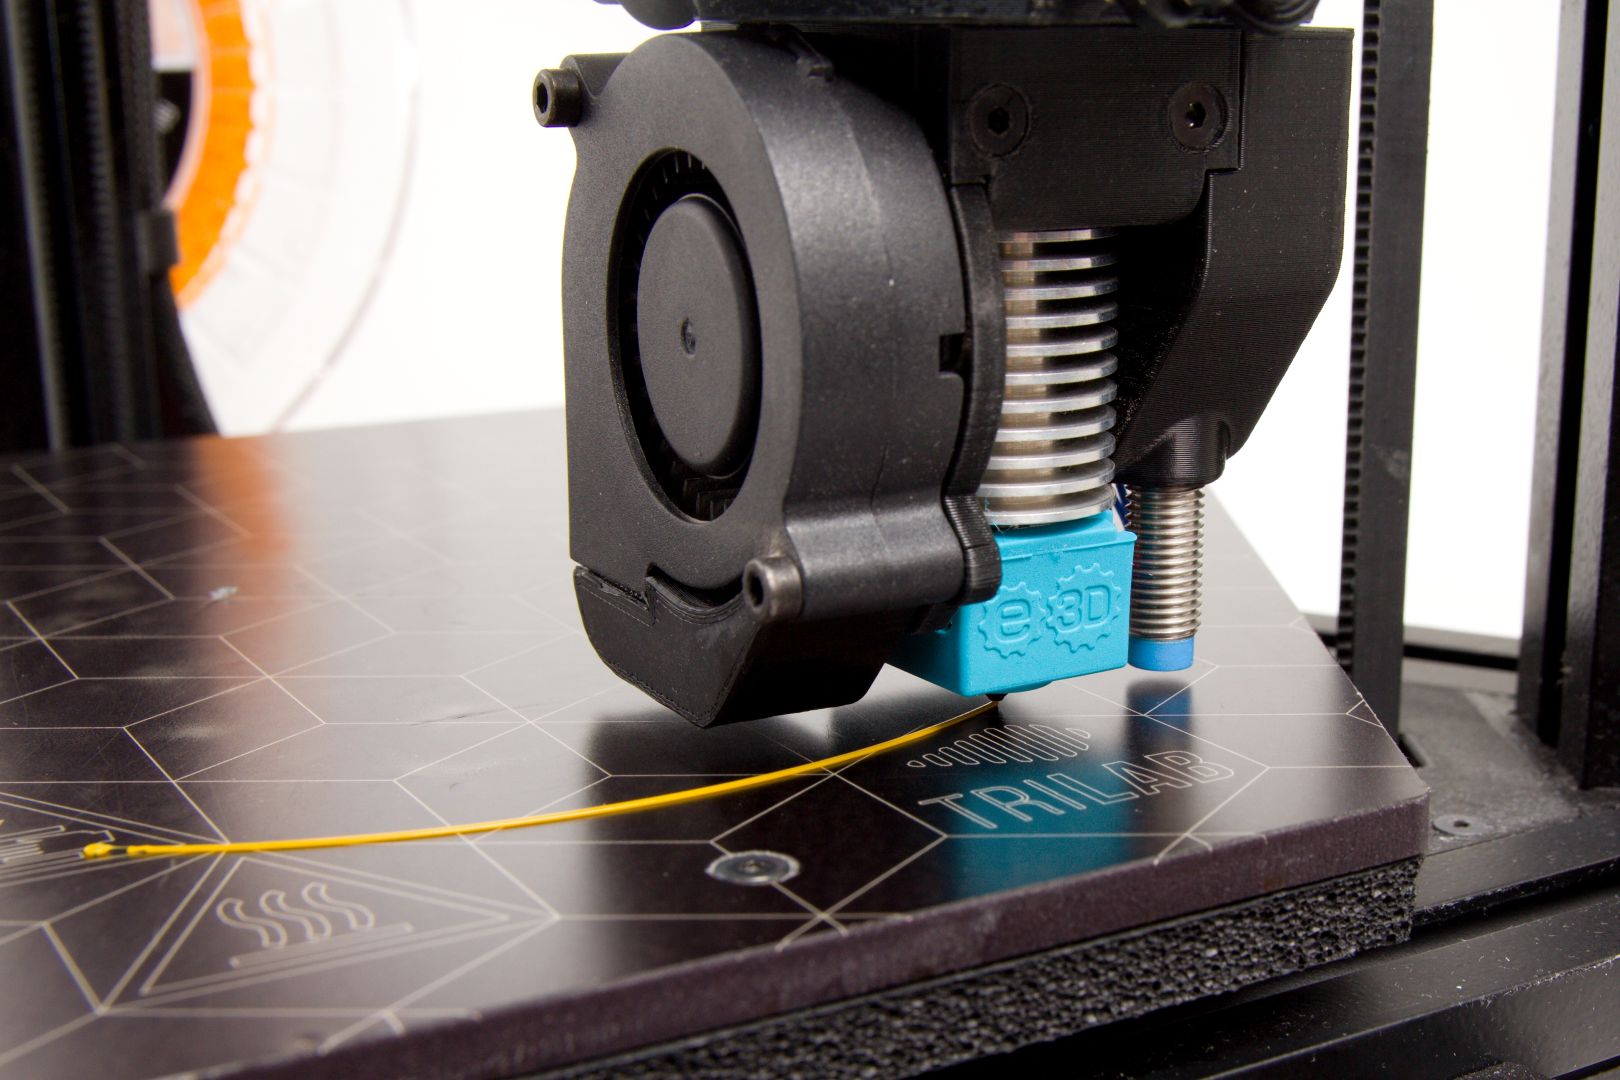
Setting the Pressure on the Titan Extruder
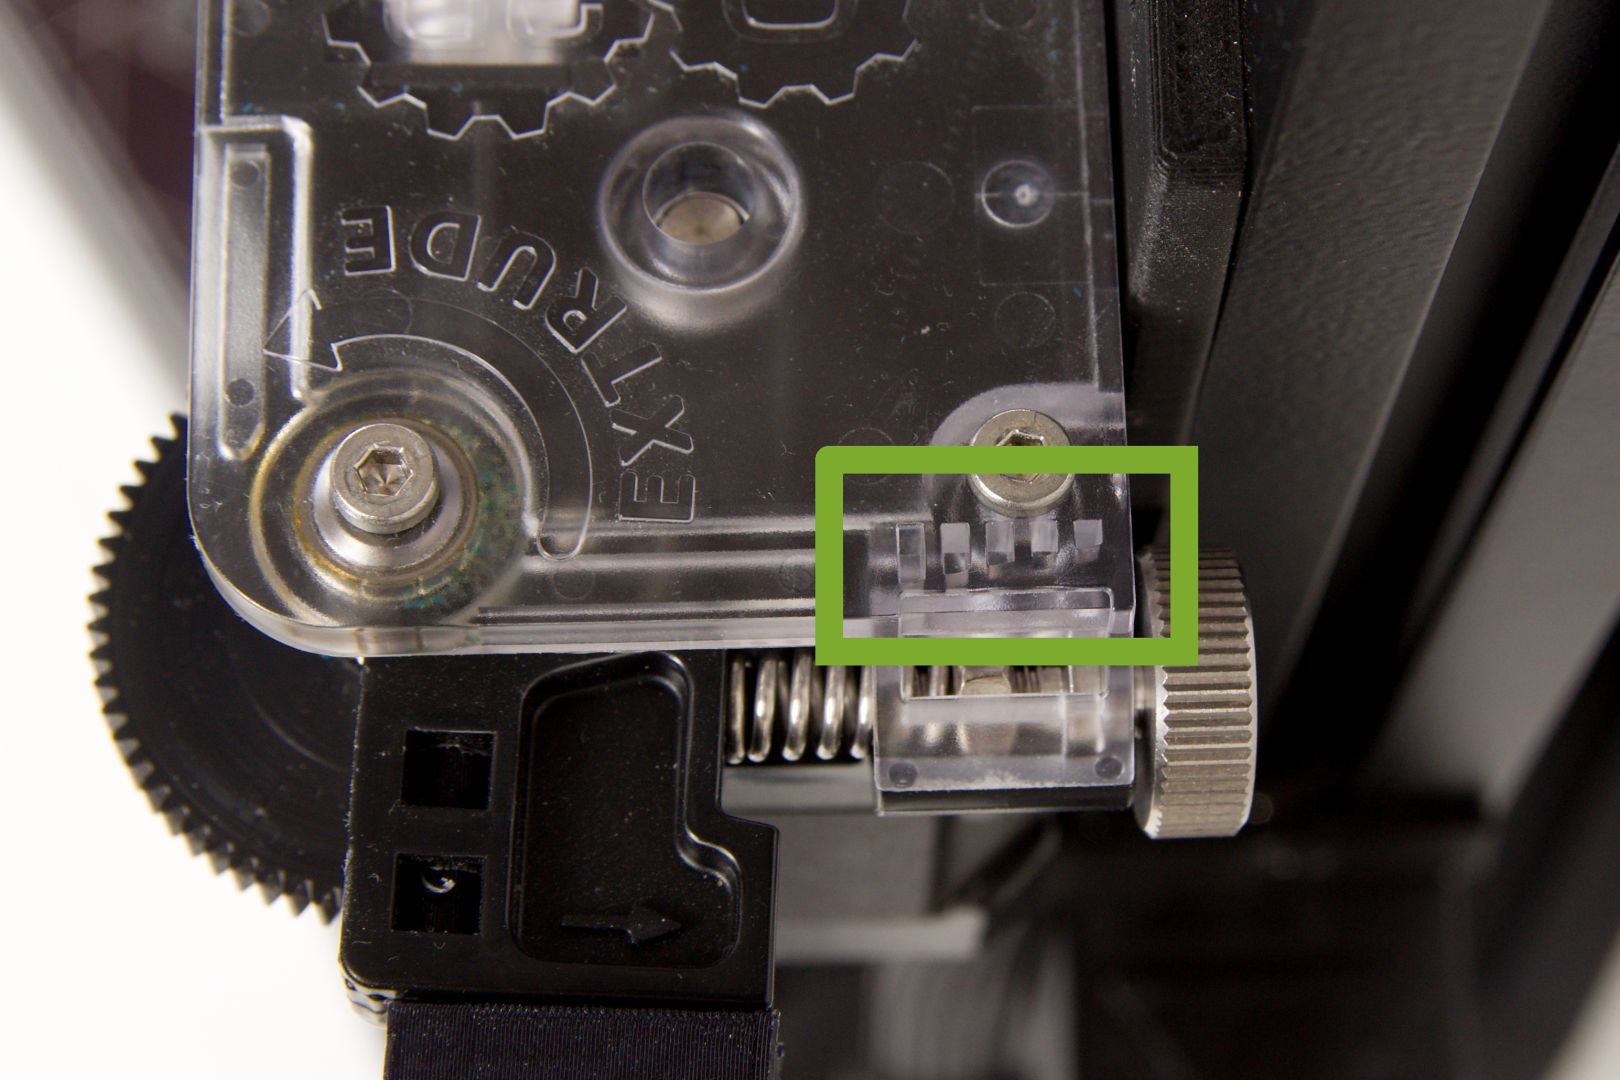
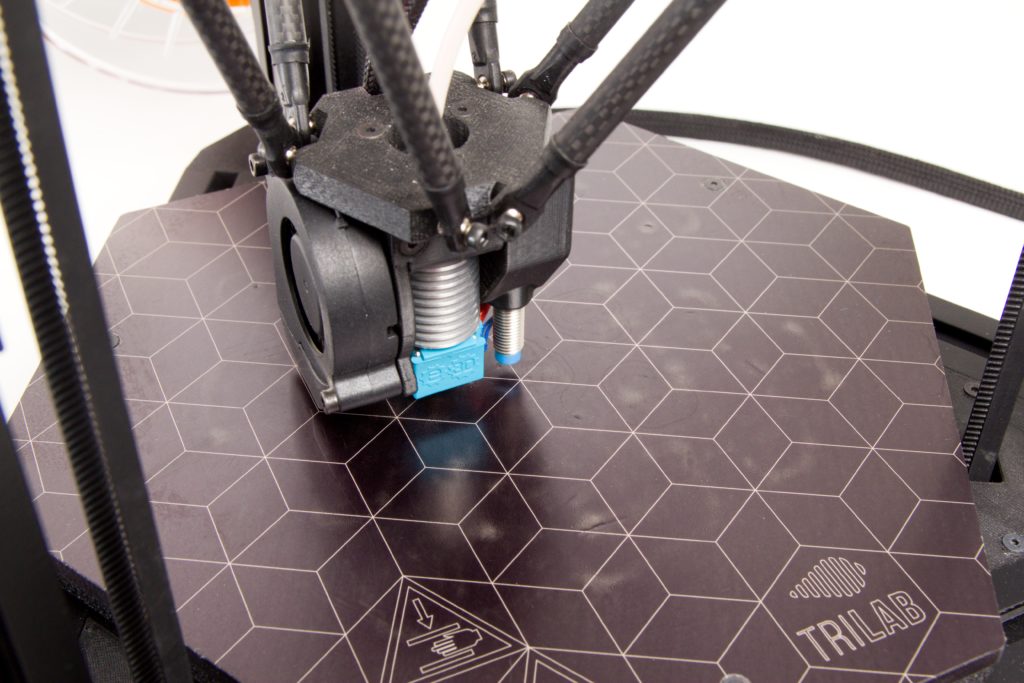
Trilab printers make it easy to change the amount of pressure that the feeder wheel exerts on the filament. However, they also come with the right pressure level set at the factory—this level is roughly at the middle of the scale, as highlighted in the picture below.
If there are significant leftovers from the filament on the feeder wheel, this may mean excessive pressure. To fix this problem, loosen the screw slightly (via clockwise rotation).
If, on the other hand, the extruder is spinning too freely and prints are showing signs of insufficient material use (porous walls or uneven extrusion), increase the pressure slightly by turning the metal screw counter clockwise.
Cooling Down the Hot End
After loading the filament, we recommend to cooldown the printhead. Small dots of leaking filament could otherwise remain on the printbed during calibration and could cause issues when printing the first layer.
- Press the printer’s control wheel to open the menu.
- In this menu, select the Control item. Then press the wheel again to confirm your selection.
- In the submenu, select the Cooldown item. Then press the wheel to confirm.
Tip: Pressing the reset button also causes a zeroing of the target temperatures followed by the cooling down of the hot end.
Tearing off the Extruded Filament
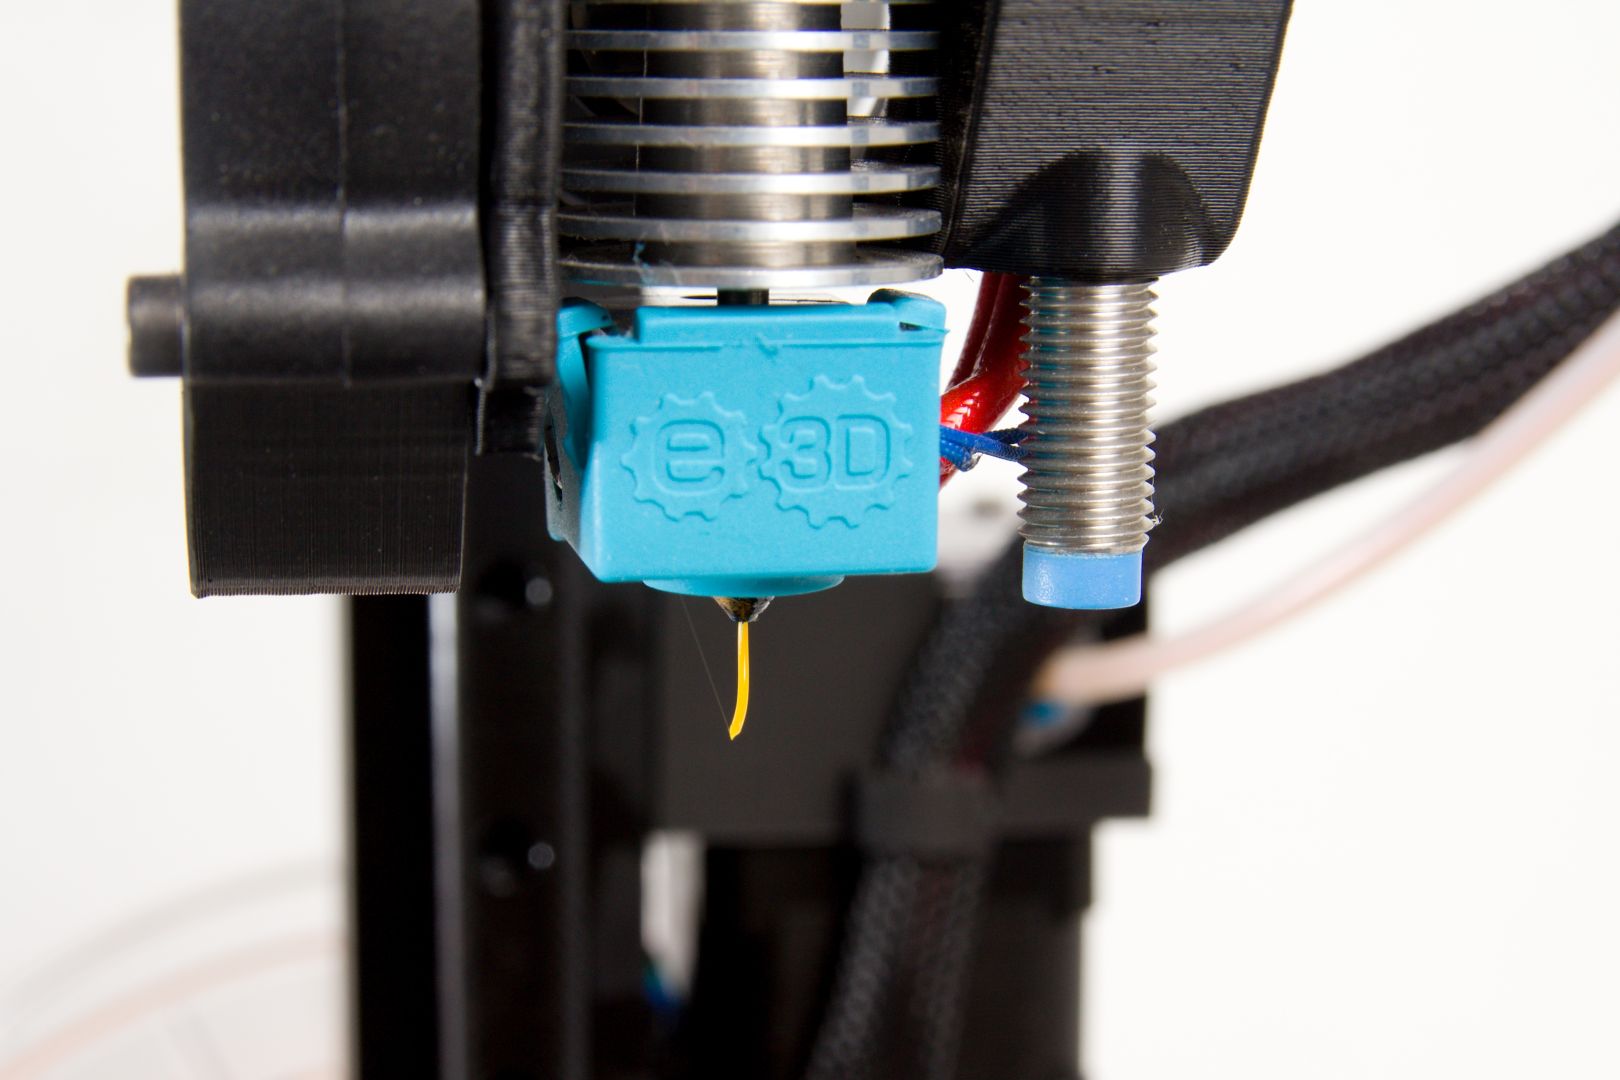
After following the steps from Inserting the Filament, a small piece of extruded filament will remain on the nozzle, and the gravity is also causing the filament to leak out further. The print head needs to be cooled down and this material removed so that it does not present any risks for future prints.
- Cool down the hot end using the steps in Cooling Down the Hot End.
- Wait for the temperature to drop below 150 °C.
- Quickly tear away the material that has leaked out of the nozzle.
Caution: If you leave the hot end to cool down to room temperature, the filament will harden, and it will be more difficult to tear it away (the whole print head may move during your attempt).
Pre-print Preparation of the Base
The right way to prepare the base varies depending on what material you will be printing with.
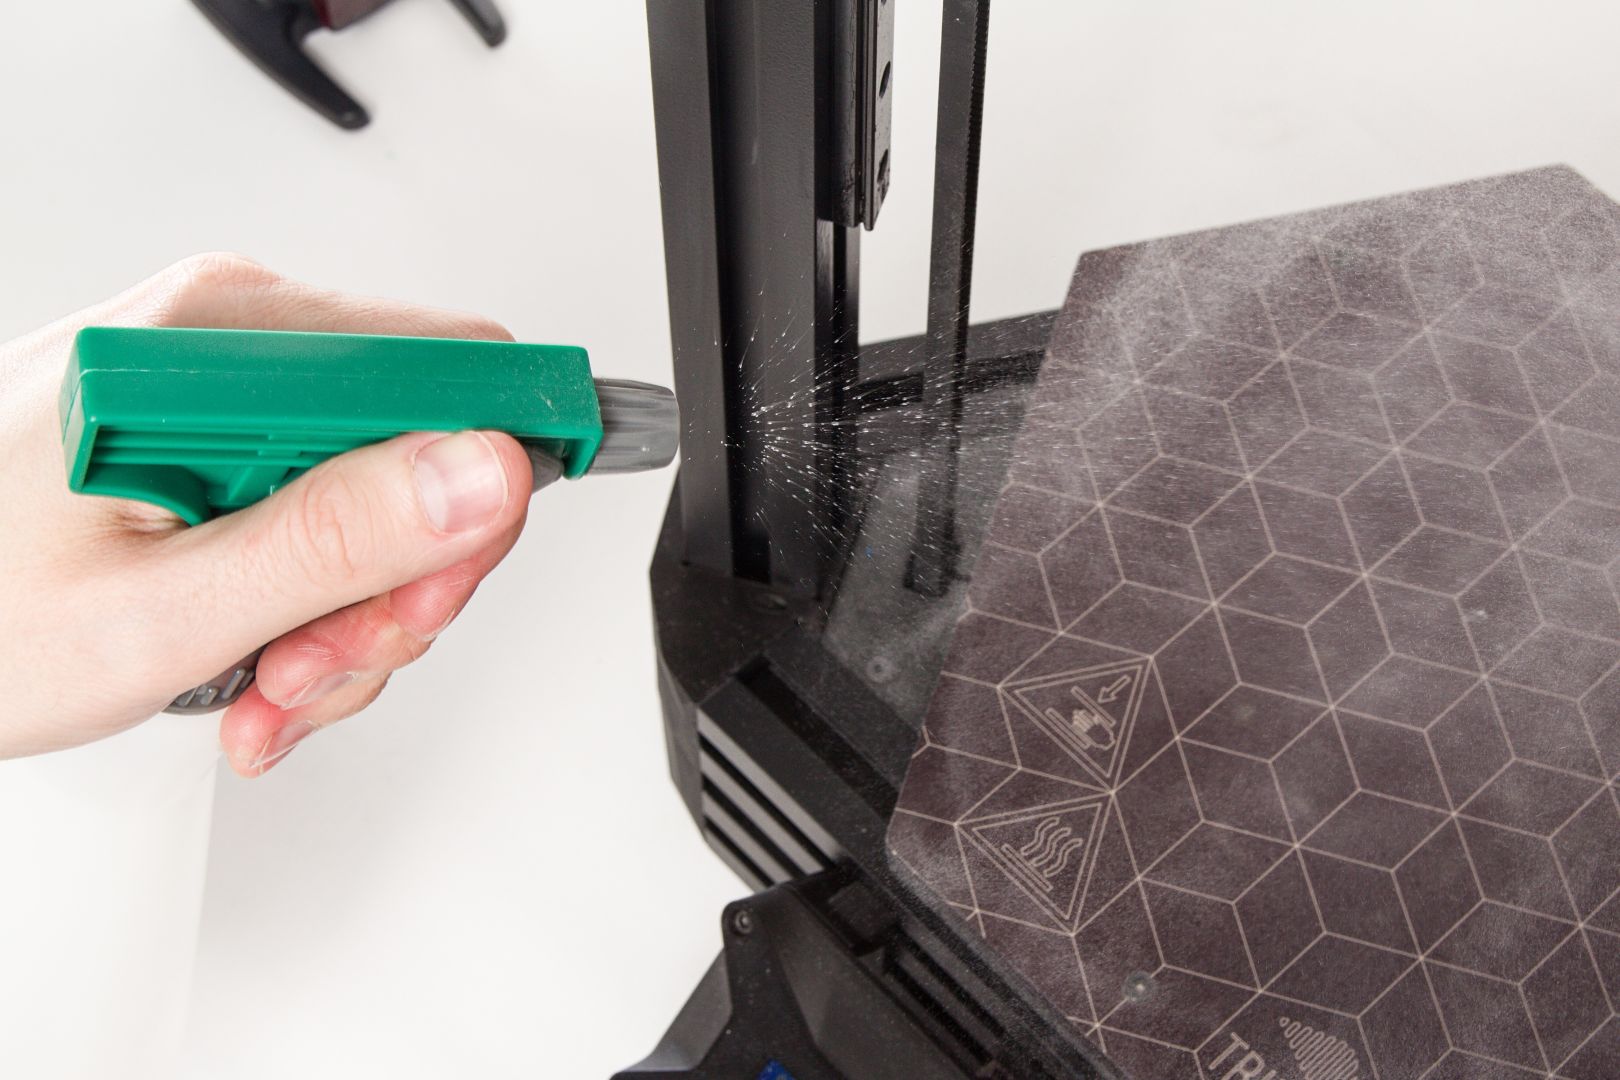
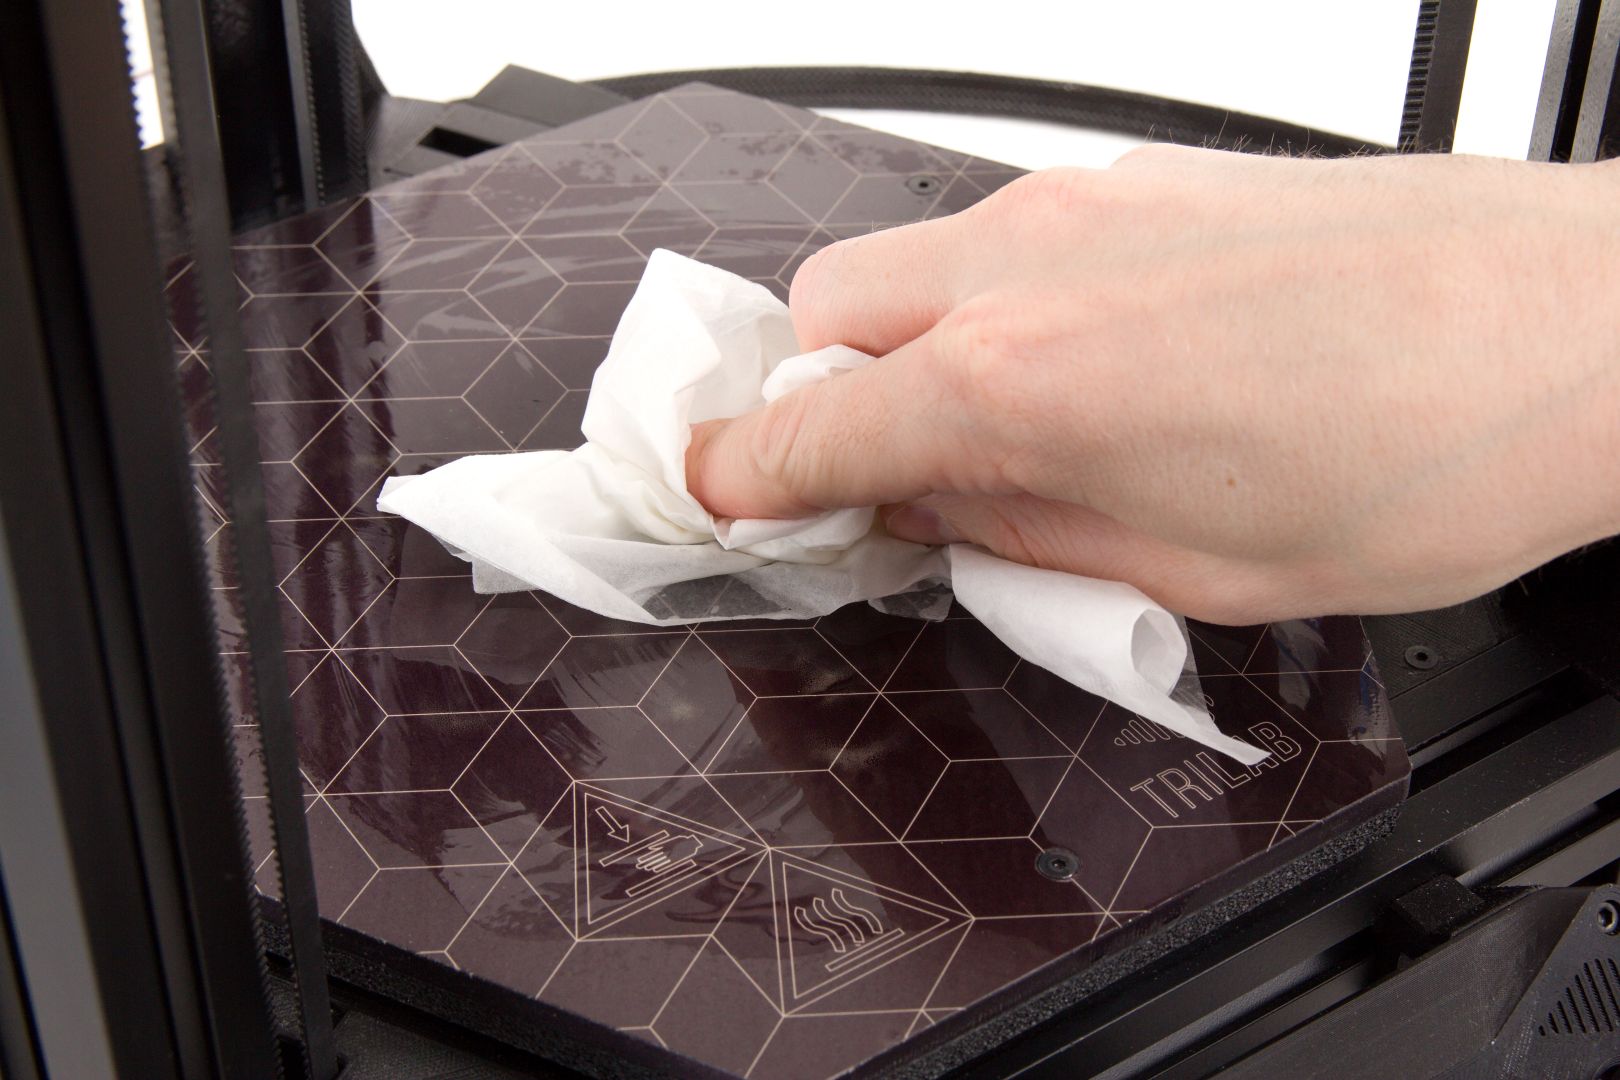
For PLA and similar materials, remove any grease from the support using isopropyl alcohol. Spray it onto the printbed with a diffuser. The base should not be heated up, because in that case the alcohol would evaporate quickly. Use a clean paper towel to wipe off the grease (common household paper tissues are great for this.).
Tip: Do not underestimate proper and careful printbed cleaning and degreasing. The PEI print surface is truly versatile and resilient, it is however very sensitive on any kind of grease or fat on its surface, even minute contamination from fingers might cause adhesion issues. If the surface is not properly cleaned, problems with impaired first layer adhesion could occur.
Use the same grease-removal procedure if you plan to print using ABS or a similar material.
For PETG and similar materials (e.g. CPE), remove the grease as well, but additionally, after removing the grease, apply window cleaner to the base and lightly spread it around so that it forms a continuous layer on the base.
Caution: With these materials, if you do not apply window cleaner after grease removal, a very strong bond will be produced between your print and the base. You will have to exert unnecessary effort when removing the print, and the print can potentially be damaged.
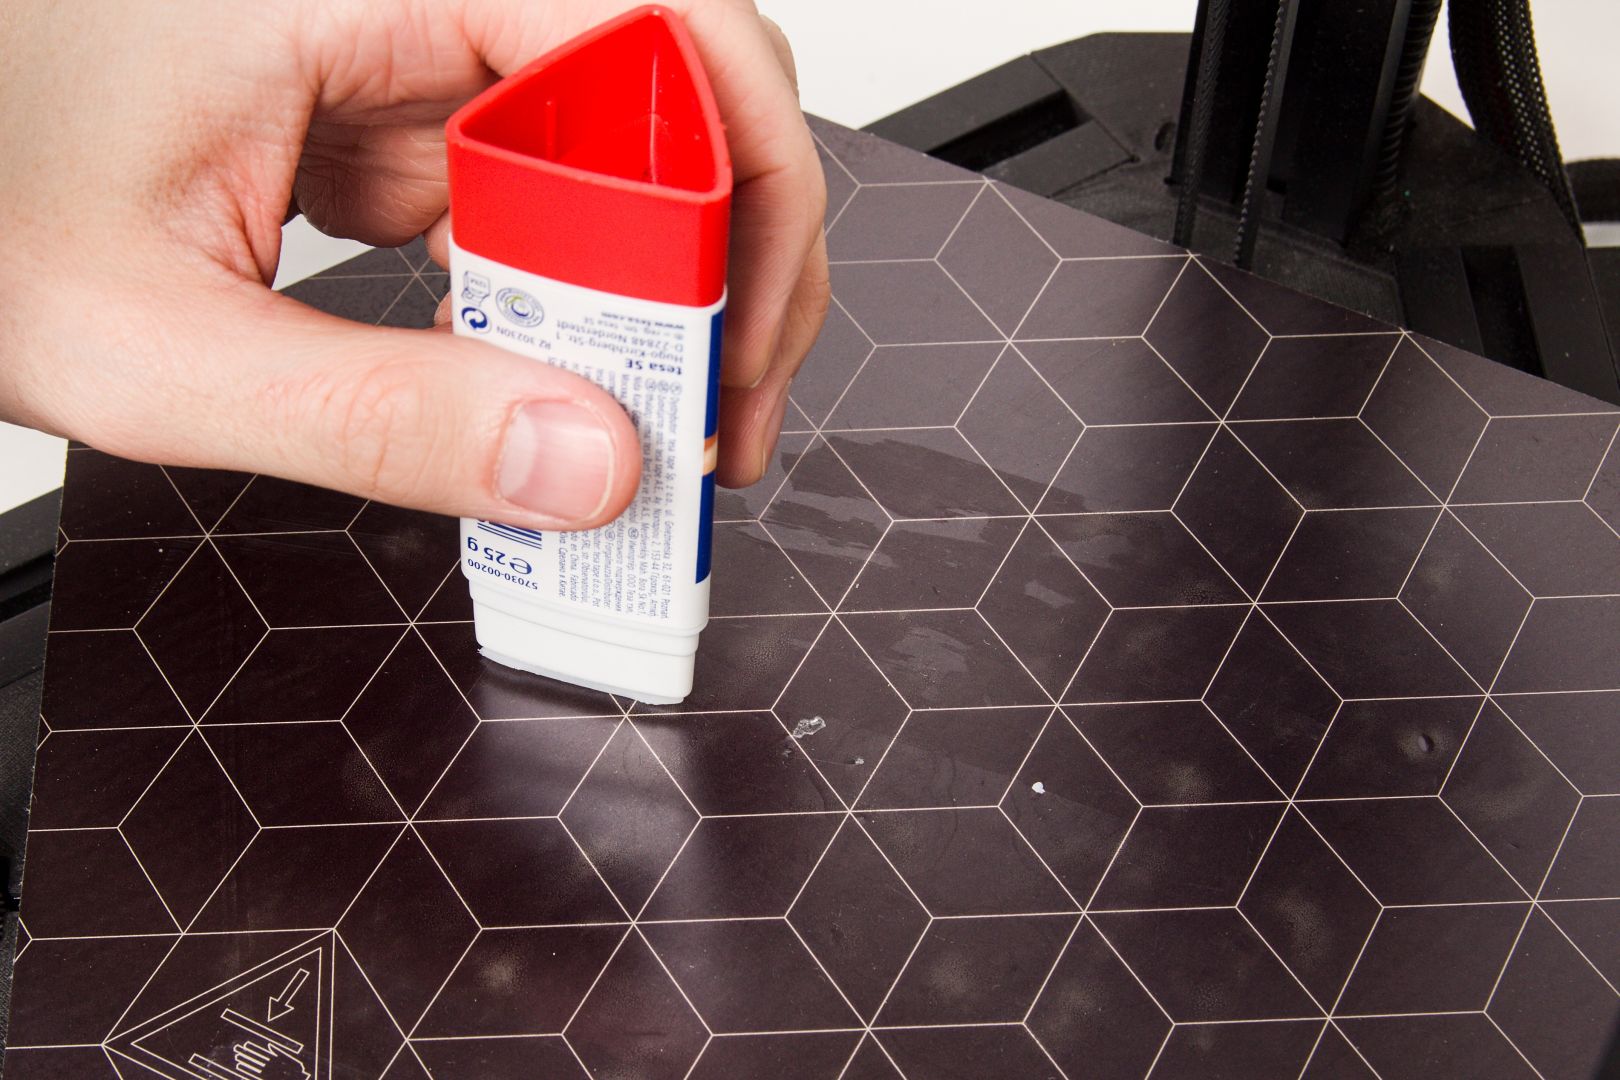
When printing flexible filaments, it is imperative to apply a thin and continuous layer of office glue on the printbed. A thin coat is sufficient, do not apply more than necessary (no visible glue lumps).
Tip: We recommend using the TESA Easy Stick or UHU Stic. Except flexibles, where the glue enables the model removal, it is very handy also for nylons, where the glue ensures proper adhesion on the printbed.
Warning: If you don’t apply the glue stick prior printing flexible filaments, then these will bond to the print surface very strongly and could result in print surface damage when trying to remove the print from the bed.
Placing the SD Card into the Printer
Already out of the factory, the printer contains several models prepared for printing. All of these are available on the included SD card, which you can find inserted into the side of the display panel.
You will also be copying your own models—in the .gcode format—onto this card. We recommend that you use the software called Kisslicer to ready your models, as we have had the best experience with it. You can obtain configuration files for this slicer from our support team.
Caution: After copying your .gcode files onto the card, do not forget to disconnect the device in Windows using taskbar icon next to the clock.
Follow a similar procedure on Mac OS and other systems. You will considerably lower the chance of SD card write errors.
Caution: Insert the SD card into the printer with its contact surfaces facing you, as shown in the following illustration.
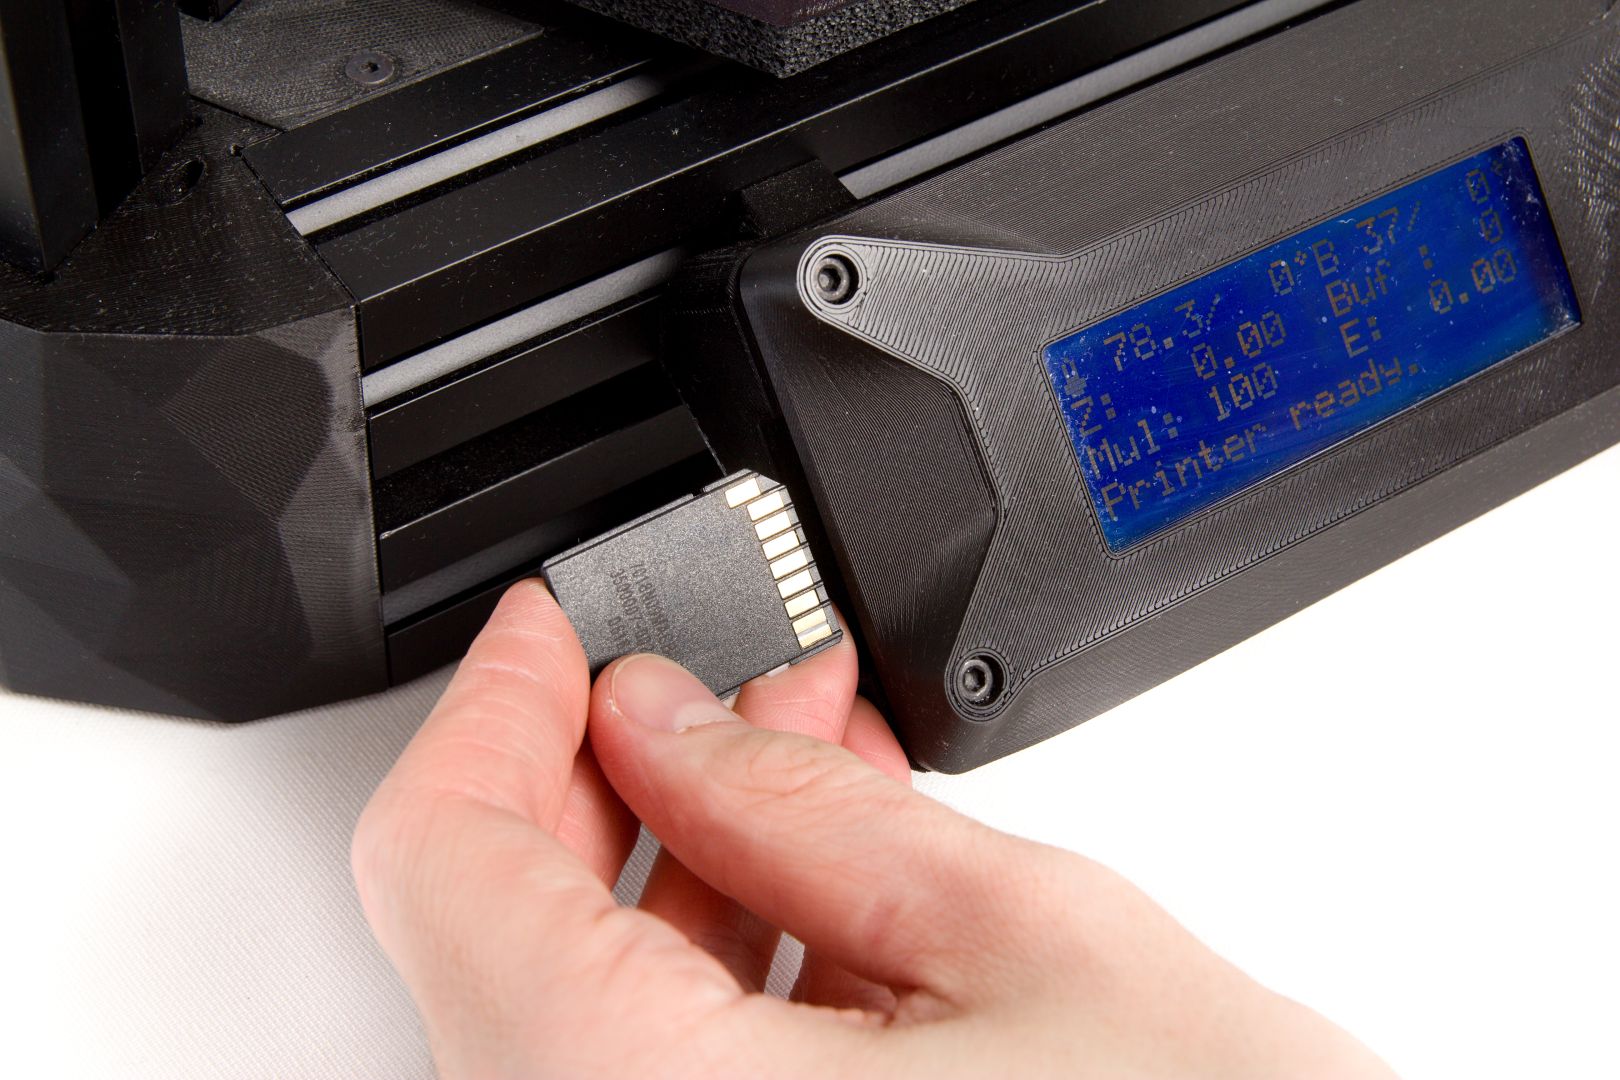
After the card has been inserted into the printer (or pulled out and re-inserted), the card’s contents are listed on the display. Use the control wheel to place the cursor over the file of your choice, and then press the control wheel to begin printing.
You can also reach the display’s file selection screen as follows:
- Press the control wheel to enter the menu.
- Select the Print File item, and then press the wheel again to confirm.
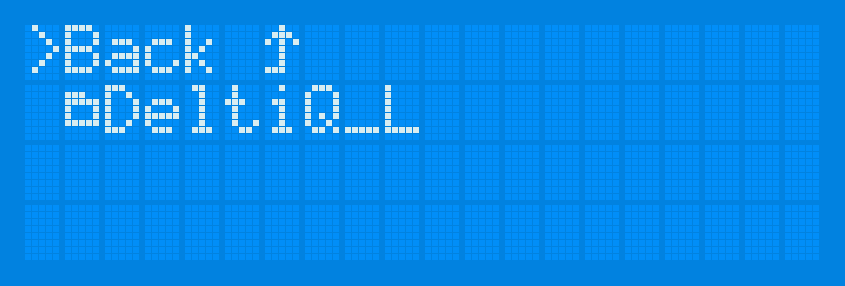
- You will now see the files on the SD card.
The Start of Printing
At the start of printing, several processes take place without any intervention by you. They are described in the following chapter.
The printer begins to heat up the printing base. The heating period varies depending on the selected material and the slicer settings.
Caution: If you wish to test the temperature of the base with your hand, do not touch any of the places where printing will be taking place. Doing this would contaminate the base with grease, and then the print would not stay in place.
After the defined base temperature has been achieved, the print head will ride down and perform calibration of the base in a total of 21 places in several rows.
After calibration is completed, the head will park in the front part just above the base and begin heating the nozzle along with the inserted filament.

After the filament has been heated up, the printer will extrude a smile-shaped pattern in the front part of the bed. The purpose of this print is to stabilize the pressure in the nozzle and wipe away any grime that is nearby the nozzle.
Then the printer begins extruding filament based on the supplied G-code.
If at any time during the print you determine that you need to terminate the print (e.g. because you chose the wrong model), use the following steps:
- Press the reset button.
- Press the control wheel three times. This causes the print head to ride out to its default position.
- Remove the printed filament from the base (using the steps in Removing the Print from the Base).
- Continue using the steps in Pre-print Base Preparation.
Printing Progress and Status Information
During printing (and also when the device is not printing), you can switch among several different info message types on the display by spinning the control wheel:
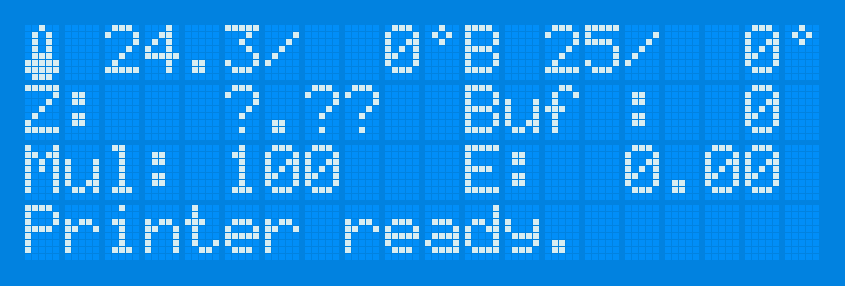
The general overview type shows the nozzle’s temperature and target temperature, the base’s temperature and target temperature, the print head’s current height on the Z axis, the status of the printer’s buffer (Buf), the print speed multiplier (Mul) and the amount of filament consumed in metres (E). The last line is a status line. On it, the printer informs you of the activity it is currently performing.
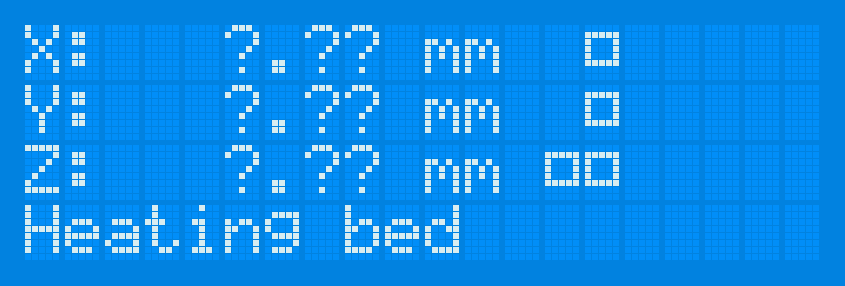
The second screen shows information on current X, Y and Z coordinates of the printhead.
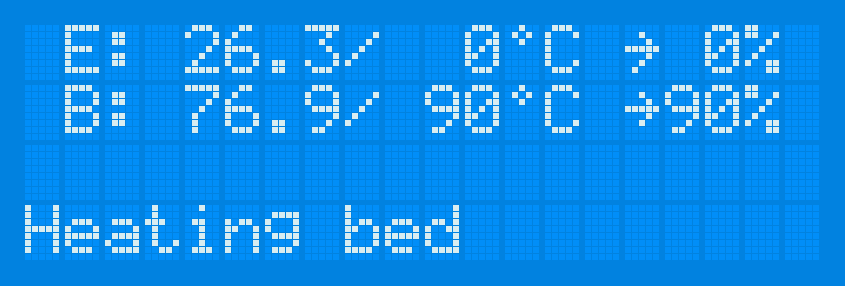
The third message type shows the nozzle temperatures (E)—current and target. The second pair of temperature readings here describes the status of the base. Here again, the last line is a status line.
Last message concerns the printer’s uptime and the amount of material printed.
Removing the Print From the Base
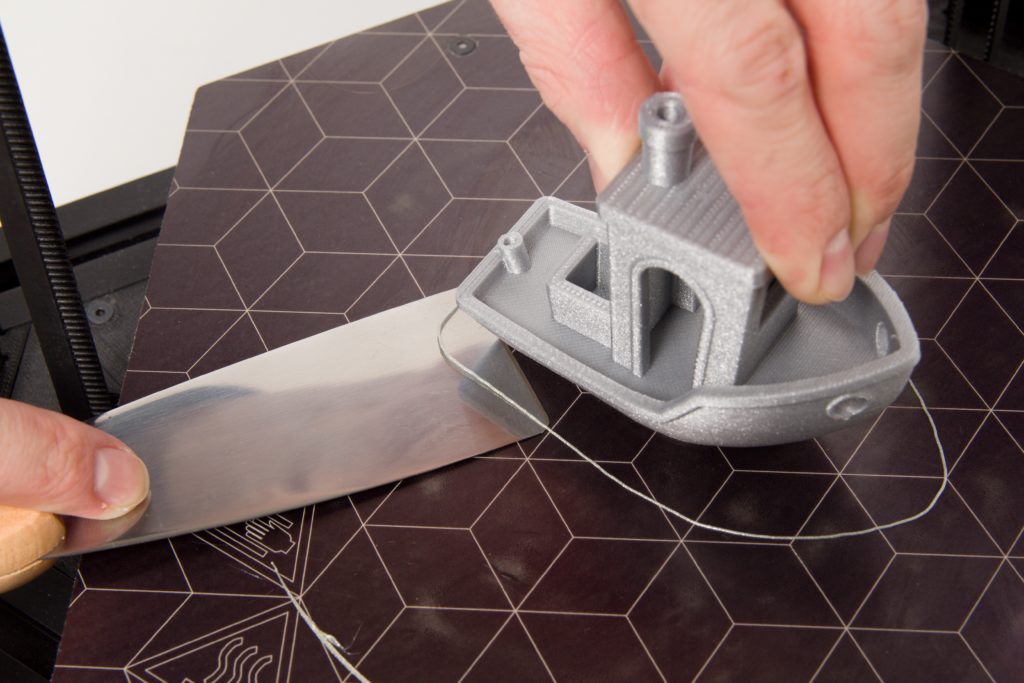
After the print has been completed, you must carefully remove it from the base. Use the included spatula for this step. Lay the spatula with one side on the base; while doing this, do not be afraid to press down with a finger to bend the spatula so that it is as parallel with the base as possible.
Tip: If your model has corners or sharper edges, this would be a great spot where to start prying the removal tool.
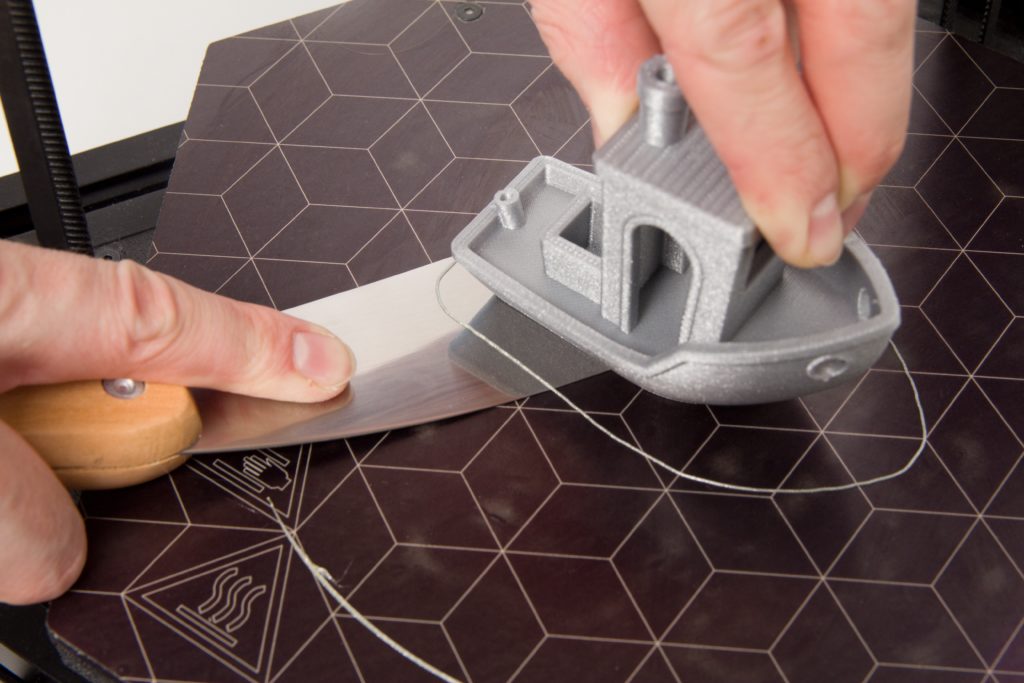
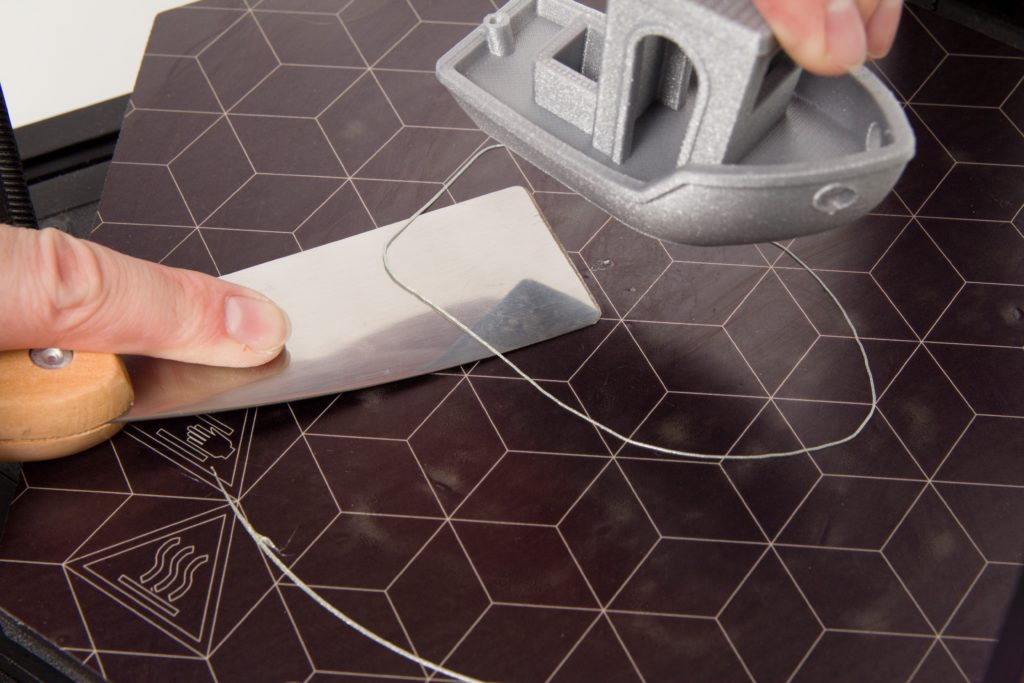
Then separate the print from the base by sliding the spatula beneath it.
Cooling Hot End Cooling Using the Fan
If you will not be immediately starting another print, you must perform extra cooling of the print head before turning it off. Wait until the hot end’s fan has stopped spinning (this fan is the least quiet part of the printer, and so you will notice this easily). Wait until the the hotend fan stops. This ocurrs at 50°C.
Caution: Turning off the printer without this cooling of the hot end can cause blockage of the filament entry. Keep in mind that PLA in particular is shapable at temperatures as low as 60 °C.
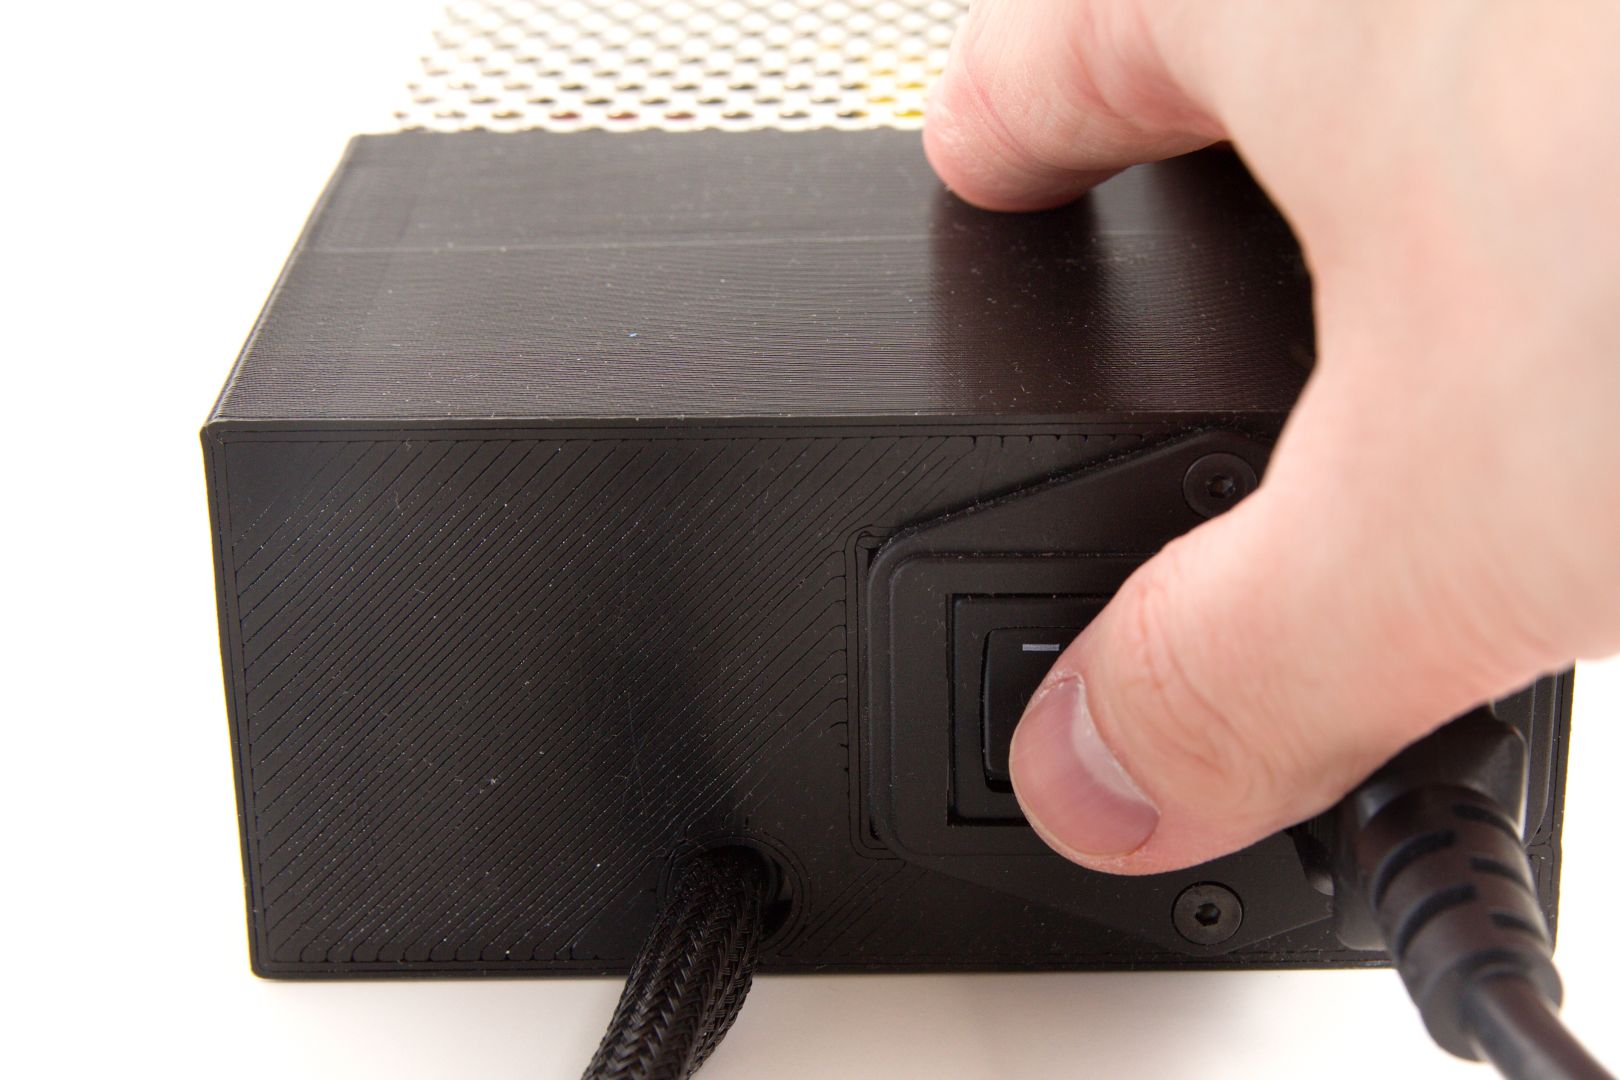
Turning the Printer Off
Turn off the printer using the switch on the power supply.