
Table of Contents
1) Introduction
2) Printer un-boxing and installation
3) Getting to know your TRILAB DeltiQ 2 printer
4) Making your first DeltiQ 2 print
5) Cheat sheet – standard printing procedure
6) How to use the DeltaControl display and application
7) How to use the WebControl online interface
8) Installing the printer on your own
9) Printer service procedures
1) Parts…2) Specifications…3) Delivery content…4) Controling…….. …4.1) Delta control….4.2) Web control
1) Printer parts

- EMERGENCY STOP switch
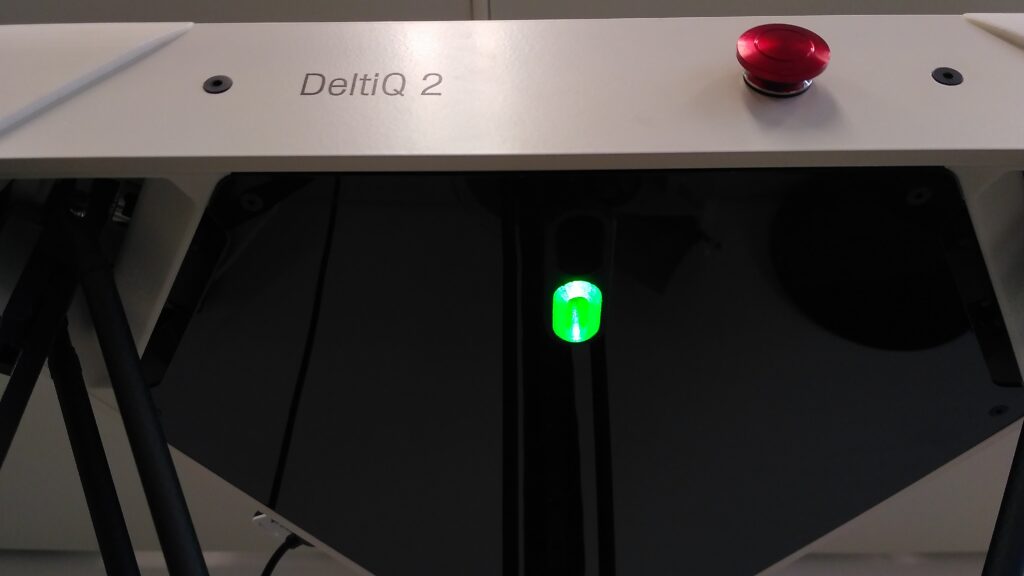
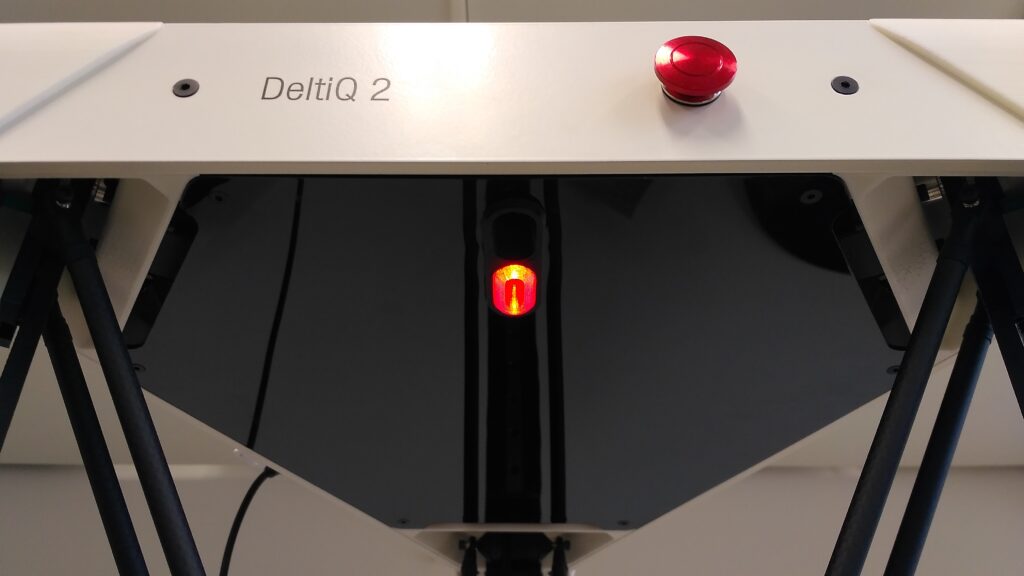
- (on the underside) surveillance camera and status diode
- arms and linear guides
- DeltaControl display (removable)
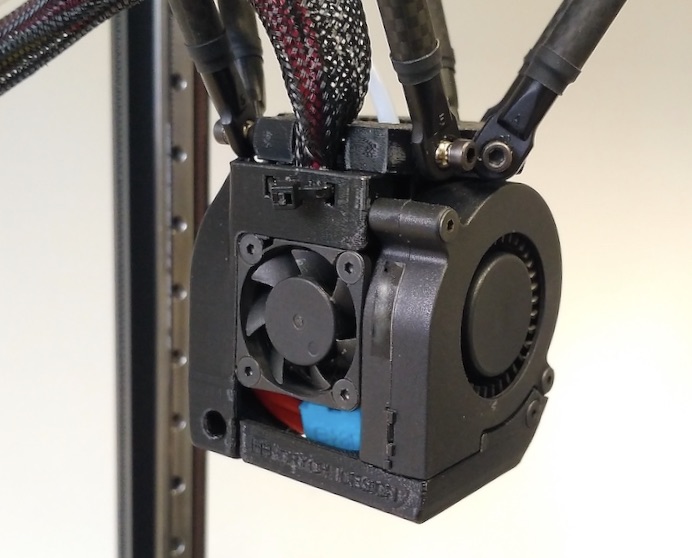
- print head with print nozzle, cooler and fans
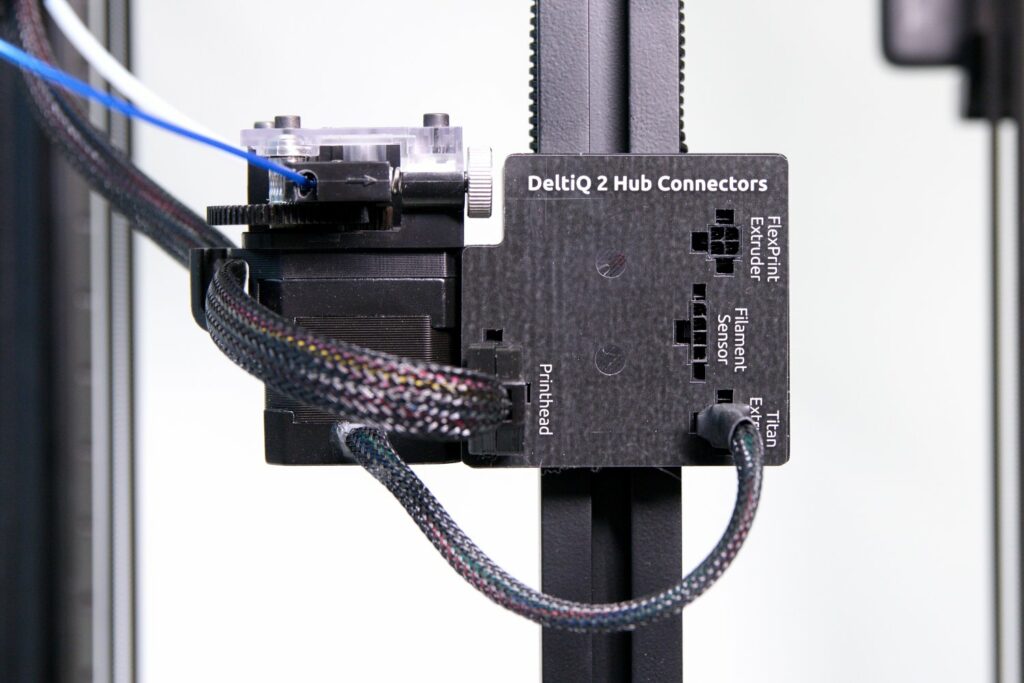
- connection HUB
- filament spool placed on the holder
- separate power source
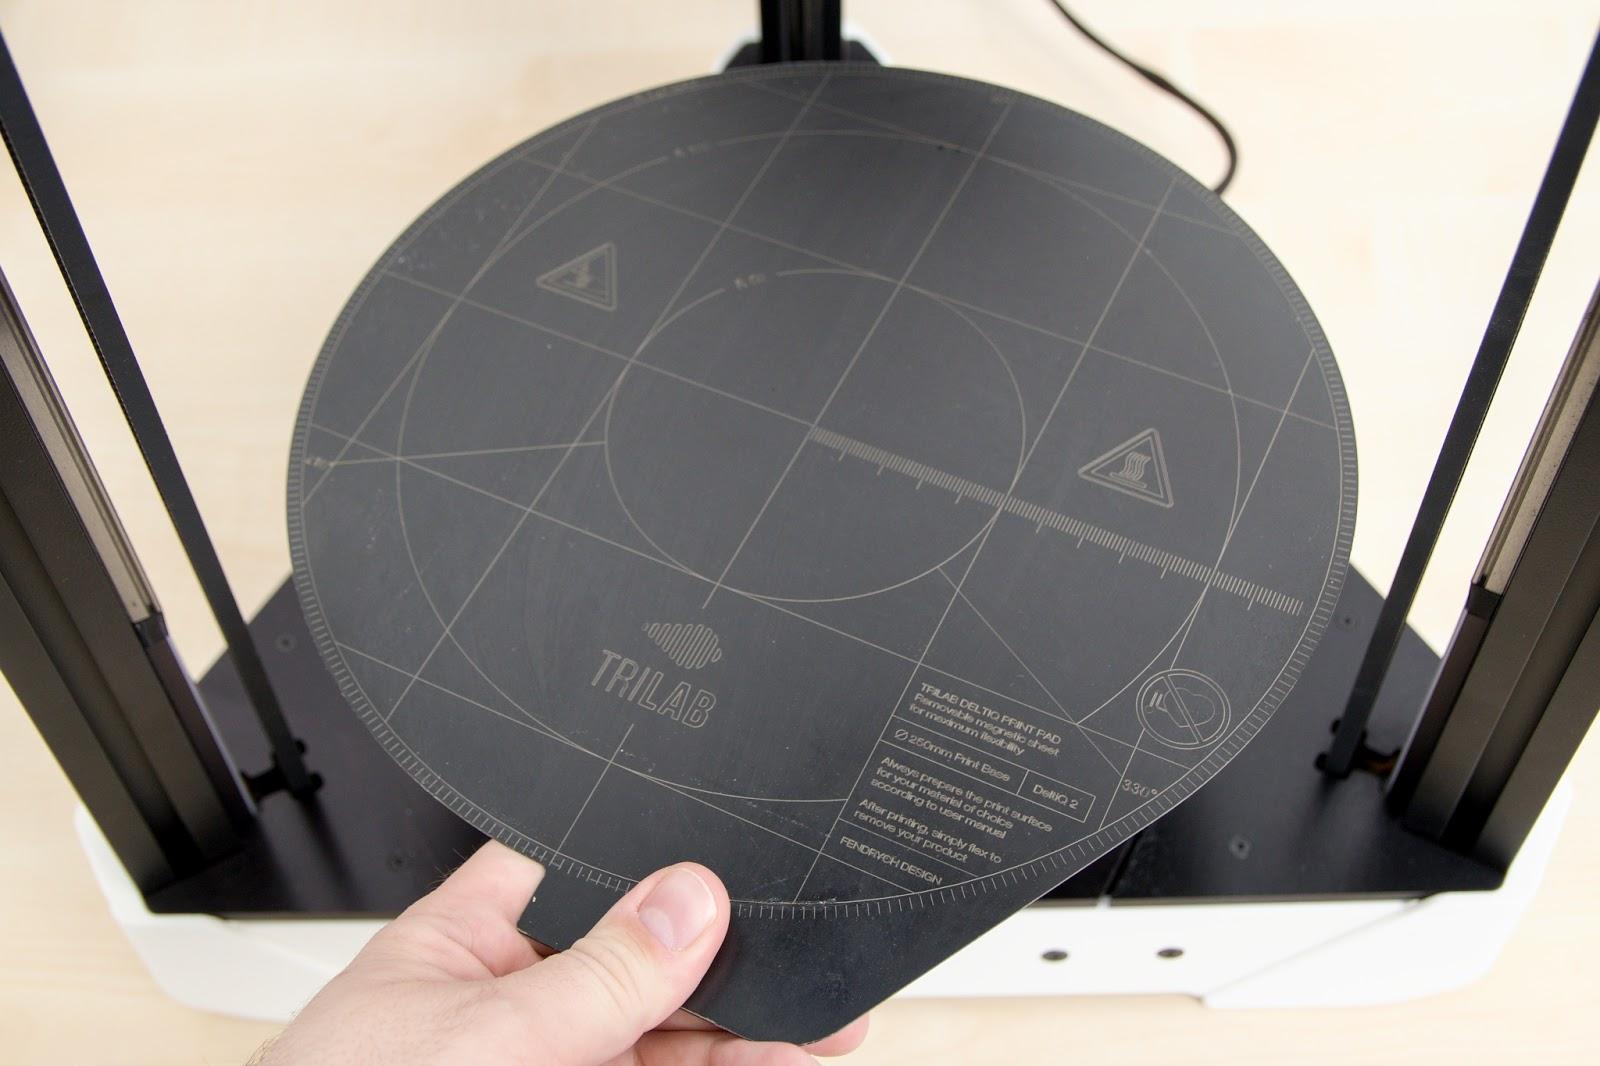
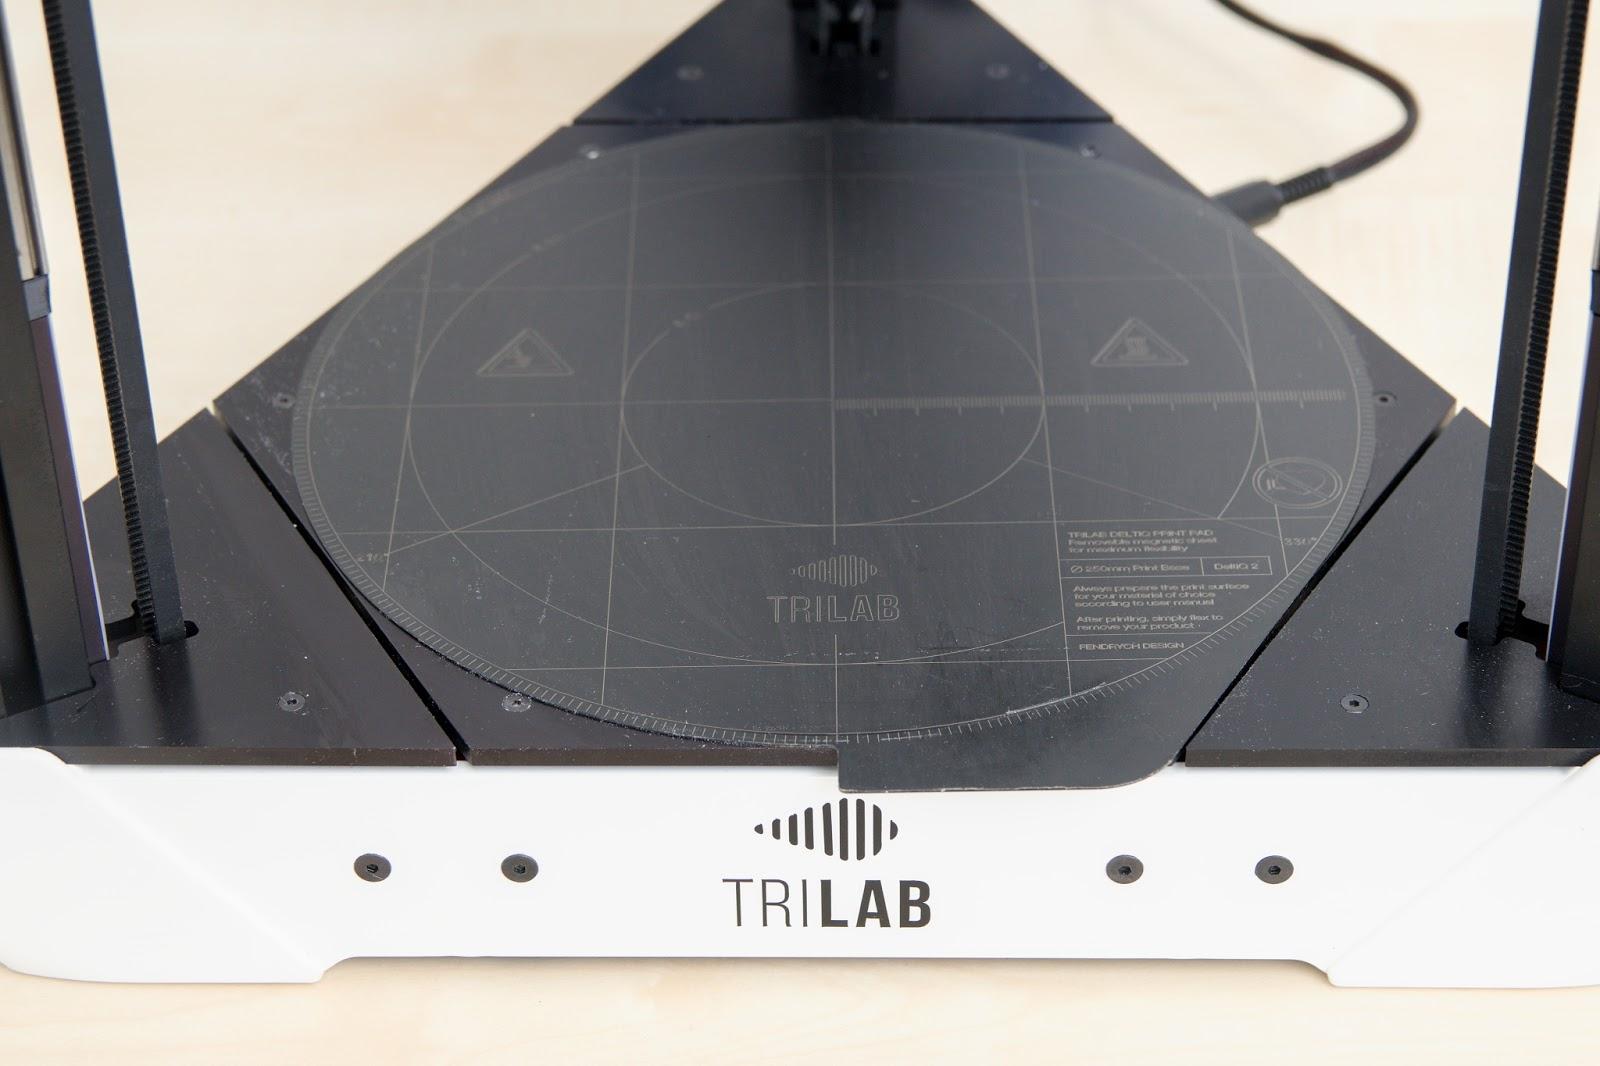
- heated printer bed with the PrintPad installed
There is a connection hub on the back of the printer which is used to fit the supplied extruder (or extruders). In the picture you can see a hub fitted with an E3D Titan extruder. This extruder is always mounted into the left slot (seen from behind).
For easy connector connection, there are labels for each connector on the hub
Caution: The supplied filament sensor is intended for use with the Titan extruder, not the FlexPrint extruder.
Warning: Any manipulation (mounting, connecting or disconnecting) with the hub must be done when the printer is turned off.
The print head ensures the melting of the filament supplied by the selected extruder and its placement on the printing pad.
Warning: The print head contains very hot parts during, before, and after printing. Be carefull.
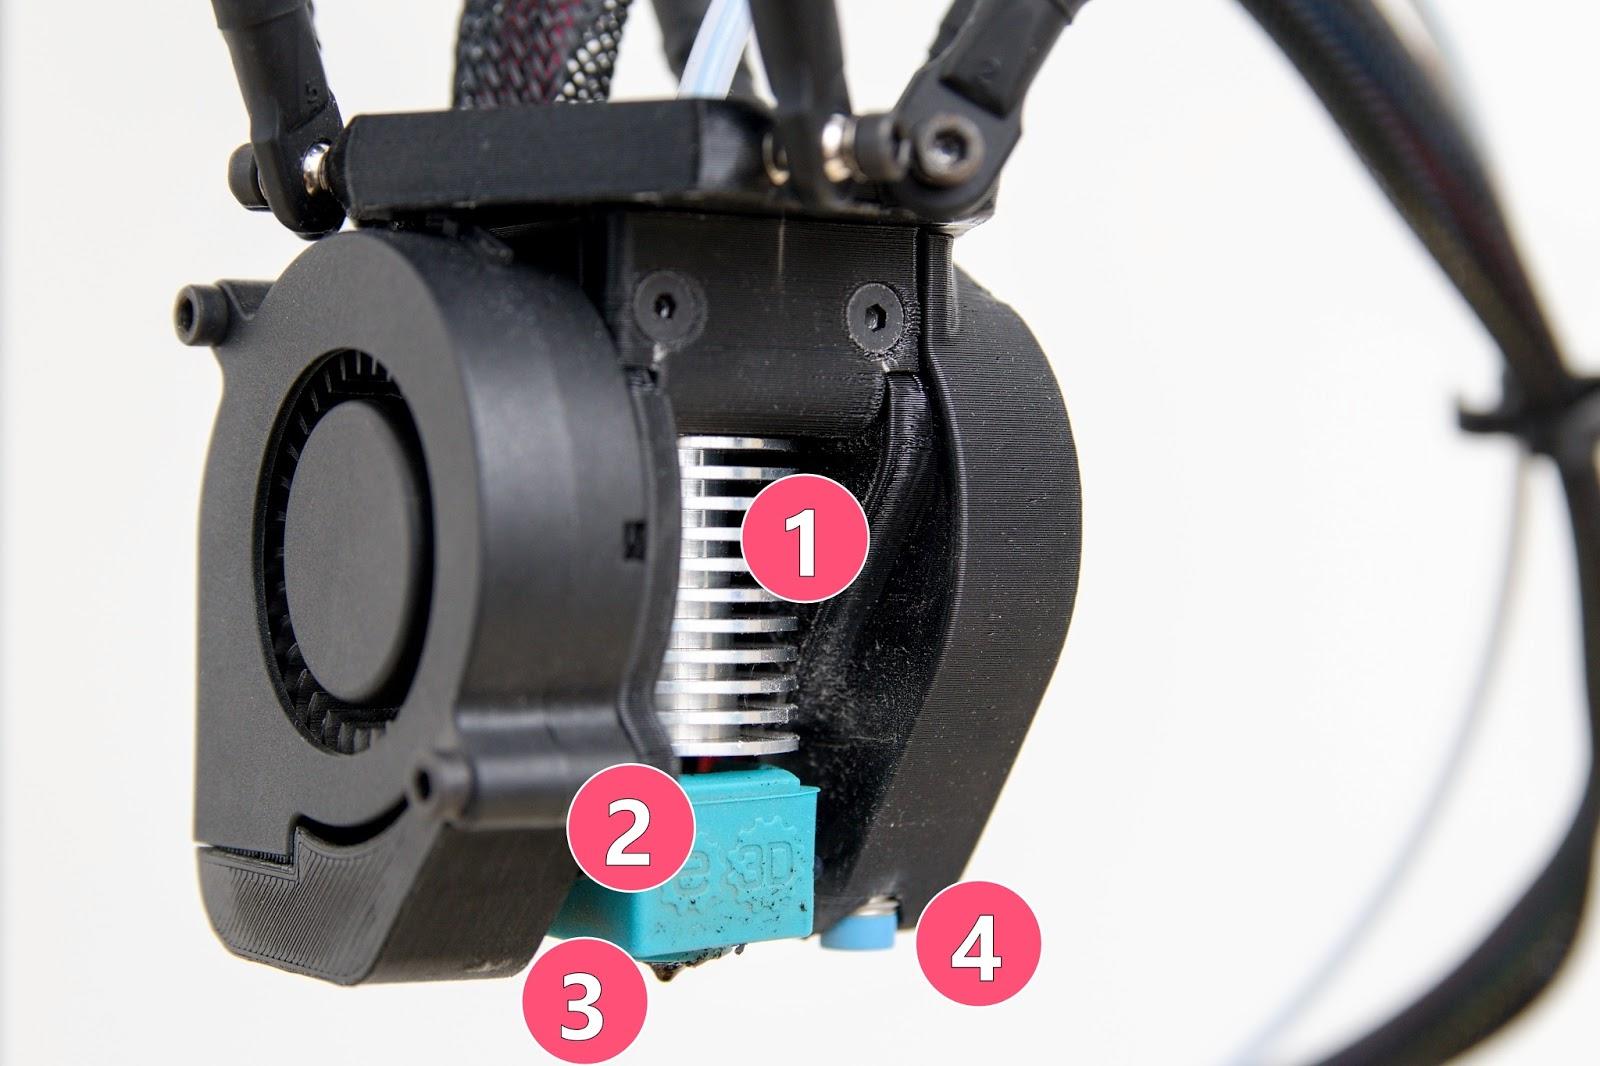
- Heatsink (helps separate the hot part of the filament line from its supply).
- Heat Block hidden in blue silicone cover.
- Nozzle (much of it is hidden by a silicone cover and the Heat Block).
- Induction probe used to determine the distance from the print head to the pad.
When looking at the print head, you will see a smaller radiator fan and a larger side fan to cool the printout.
The flexible removable sheet called the PrintPad is an important component and has a special print finish. Prints physically take place on the PrintPad. As described below, the PrintPad is placed on the mat and is held in a stable position by magnetic force.
Warning: Never wash PrintPad with the water (to prevent the stain of the edges).
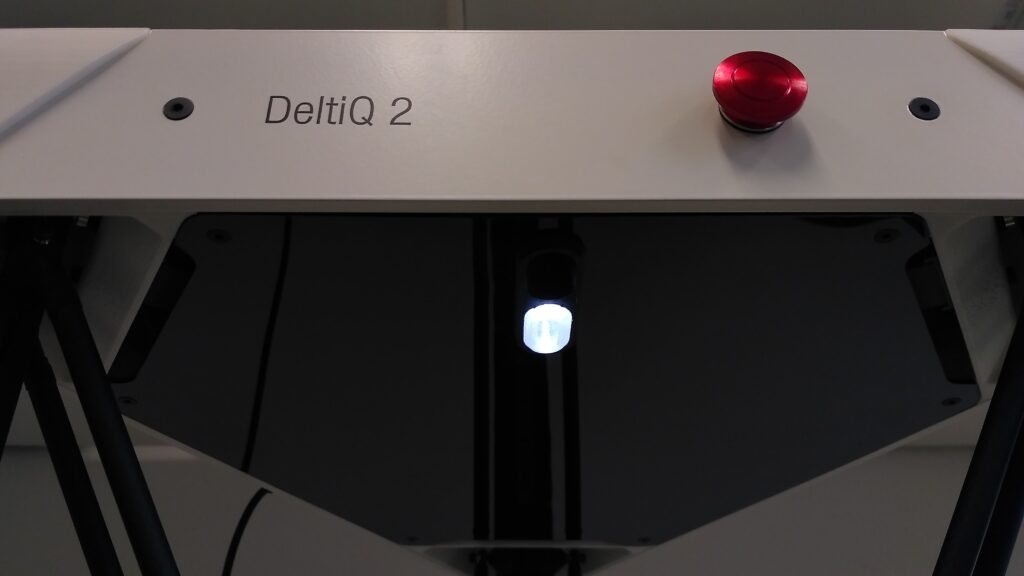
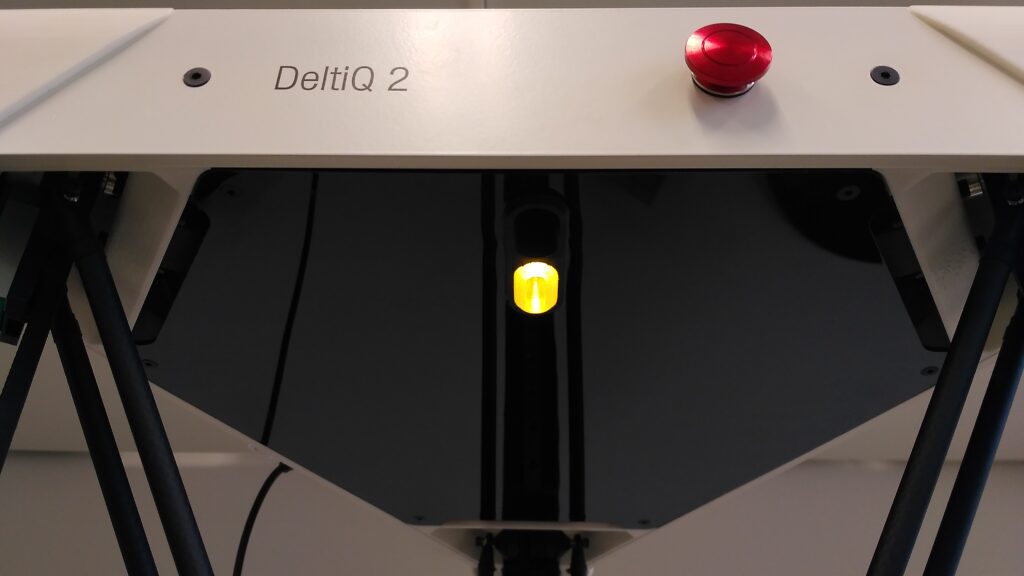
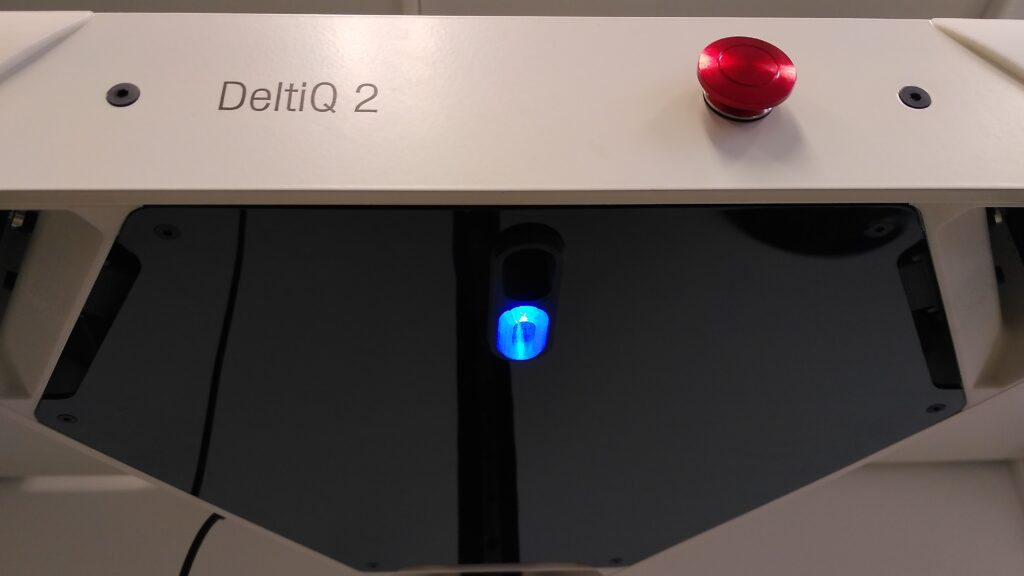
The status LED is located on the bottom of the printer’s top cover, right next to the surveillance camera. There are several light modes based on its current state.
- White light – The printer is idle and ready for commands
- Yellow light (Busy) – The printer is performing service tasks such as firmware updates
- Blue light (Printing) – All operations related to printing and printing itself are performed
- Blue and white blinking – the nozzle or pad is heated to 50 ° C or more
- Green light – confirmation of successful update installation
- Red light (Halted) – non-standard behavior detected, see the WebControl interface for details
2) Printer specifications
Specification details can be found on the TRILAB DeltiQ 2 product page . To keep the content up to date, we won’t copy the entire spreadsheet here.
3) Product package content
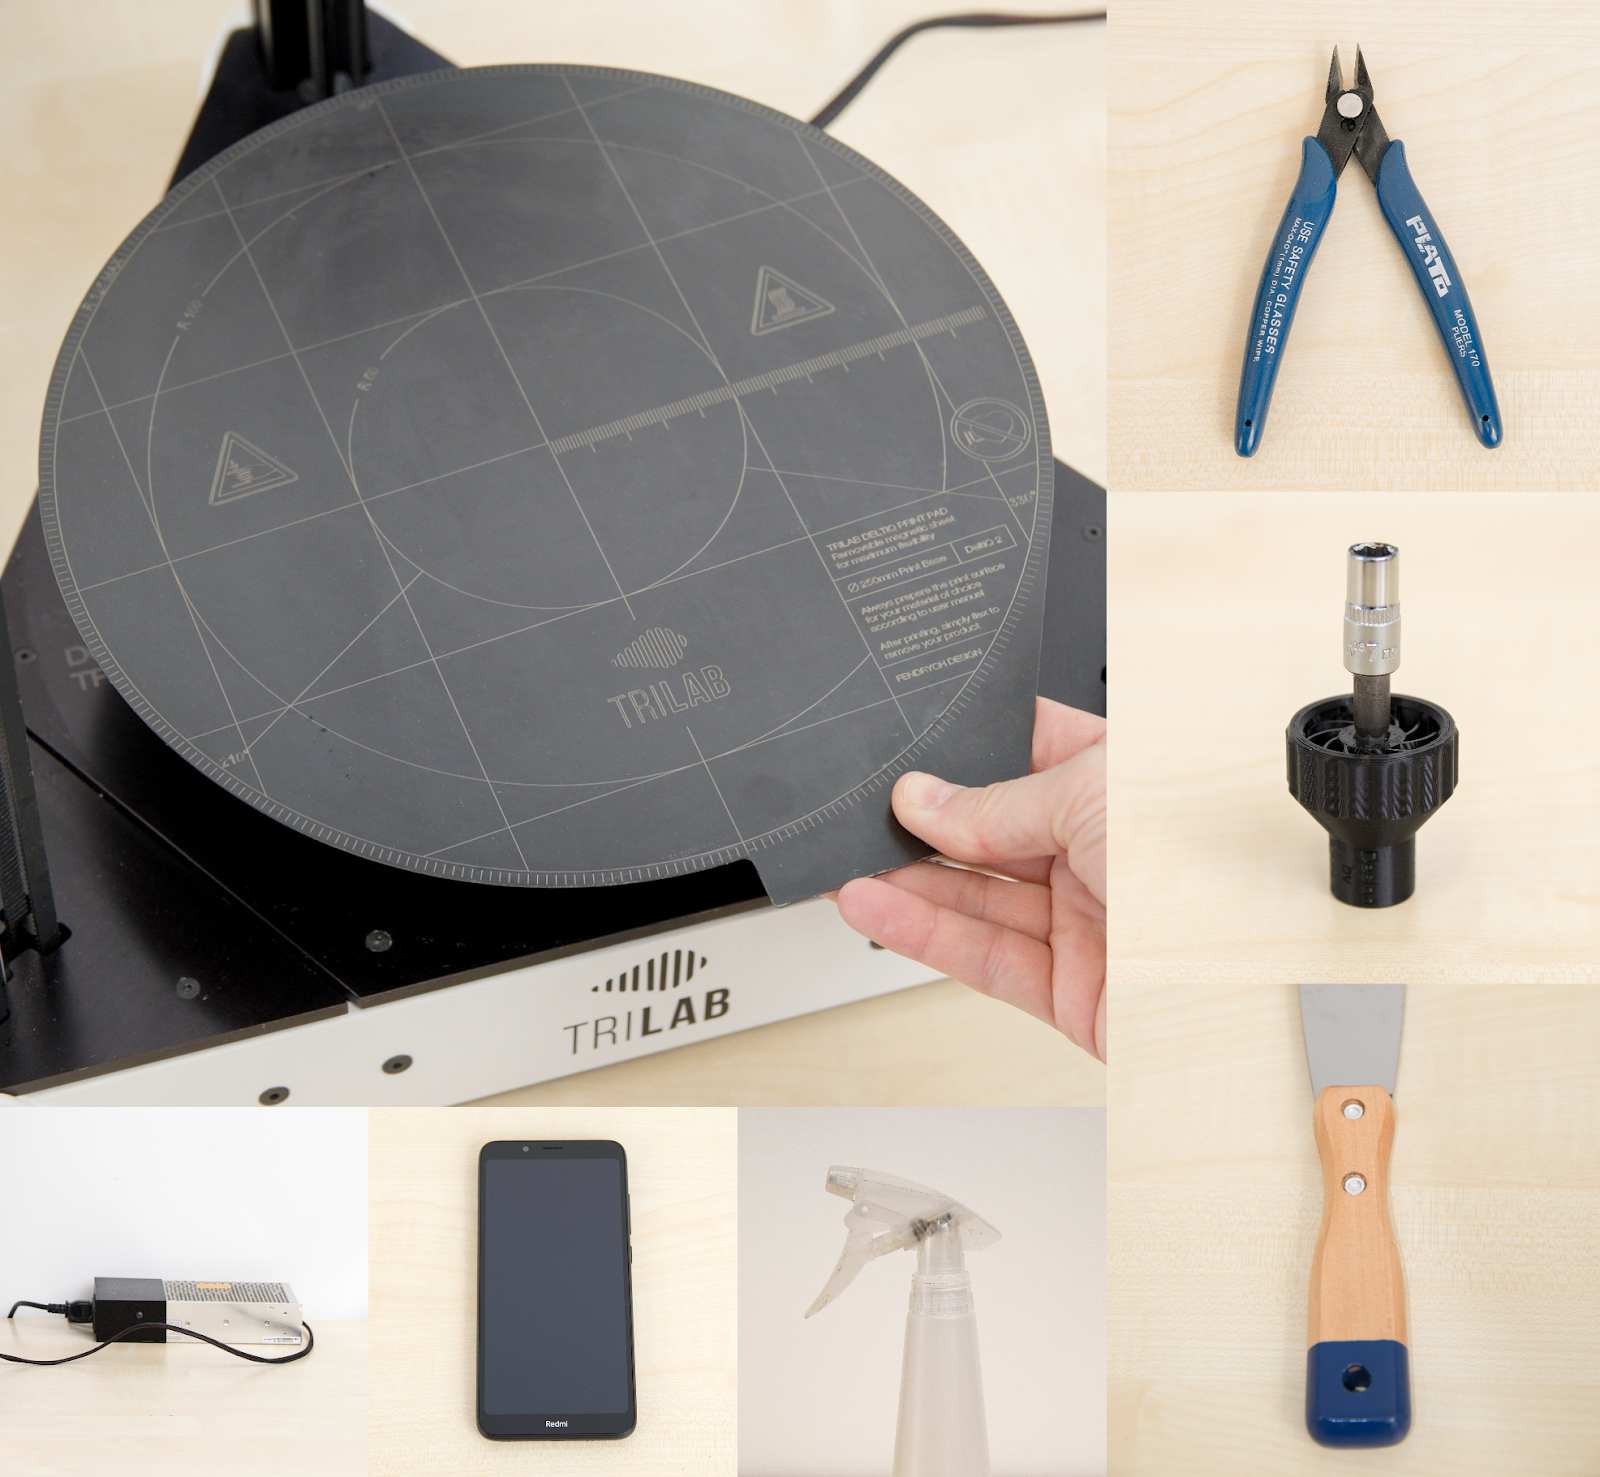
In addition to the printer itself, several other items are included standard as shown in the collage above: one or more TRILAB PrintPad pads, pliers, a nozzle tightening spanner, a spatula to separate printouts, an IPA container for cleaning the PrintPad, the DeltaControl display and an external power supply. One or more spools of filament (typically one of PLA material) is also included.
4) How to operate your printer
The TRILAB DeltiQ 2 can be controlled in a very unique way that offers many benefits. However, it’s necessary to understand the fundamentals first so please pay attention to the following paragraphs.
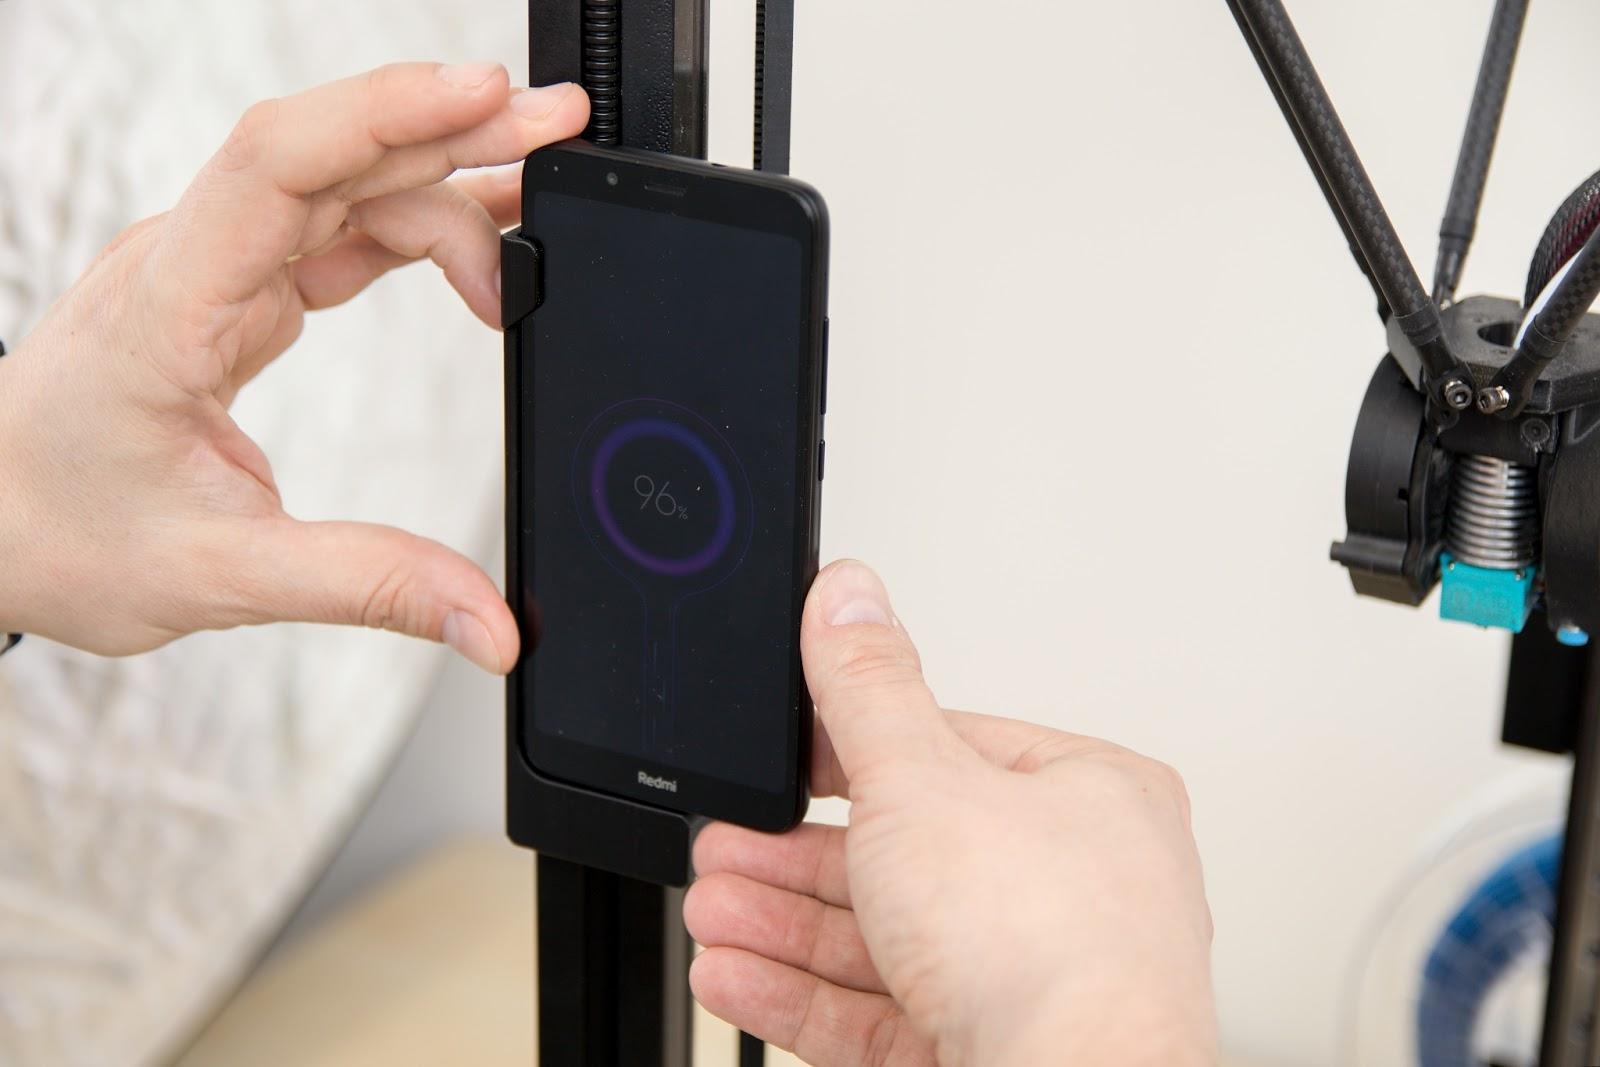
This printer offers two ways of controls. The first is by using the TRILAB DeltaControl display, which consists of a smartphone and its charging station on the printer itself.
Caution: The default password is 2580. It may be changed according to your needs.
The DeltaControl display can be removed from the station and used anywhere within Bluetooth range. However, we don’t recommend using it as your personal phone, since you will most likely be sharing it with multiple users.
Tip: When removing the display from the printer, lock it with the side button to avoid accidentally touching the controls.
Caution: Pull the display directly up and never to the side of the station. Doing so will prevent unnecessary strain of the charging connector located on the bottom of the station itself.
DeltaControl offers basic printing tasks such as – setting printer temperatures, selecting a file to print, and controlling printing progress. You can learn more about using the DeltaControl display and its application in a following chapters.
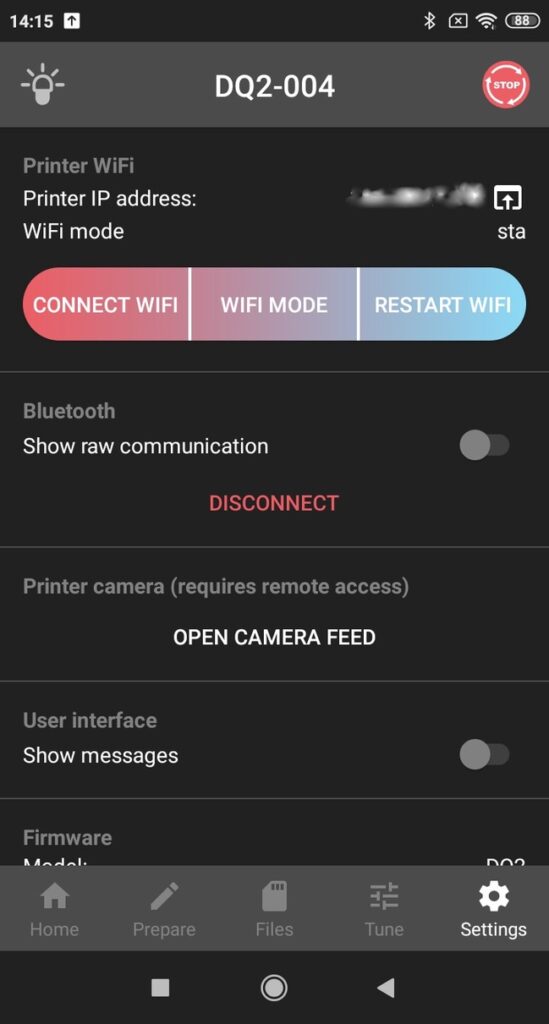
The second way to operate the printer is through the WebControl online interface, which allows you to connect to the printer from any computer on the same network, or elsewhere (if enabled). WebControl offers comprehensive printer control and is usable on PCs, tablets and phones, and is platform independent (through a web browser). A more detailed description of the WebControl application can be found in a following chapters.
DeltaControl and WebControl complement each other perfectly. A proven workflow usually consists of configuring the printer and preparing the data to print using the WebControl from the comfort of your computer. Afterwards, printing can start after preparing the printer using DeltaControl. In the same application, you will have a complete overview of the printing progress and the ability to pause or cancel printing at any time.
Caution: The DeltaControl display is controlled by the smartphone and the charging station located on the printer frame. During normal use, the smartphone constantly charges through the printer power supply. In the case of infrequent printer use, we recommend that you turn off the phone between prints.
4.1) Connecting the printer to the DeltaControl display
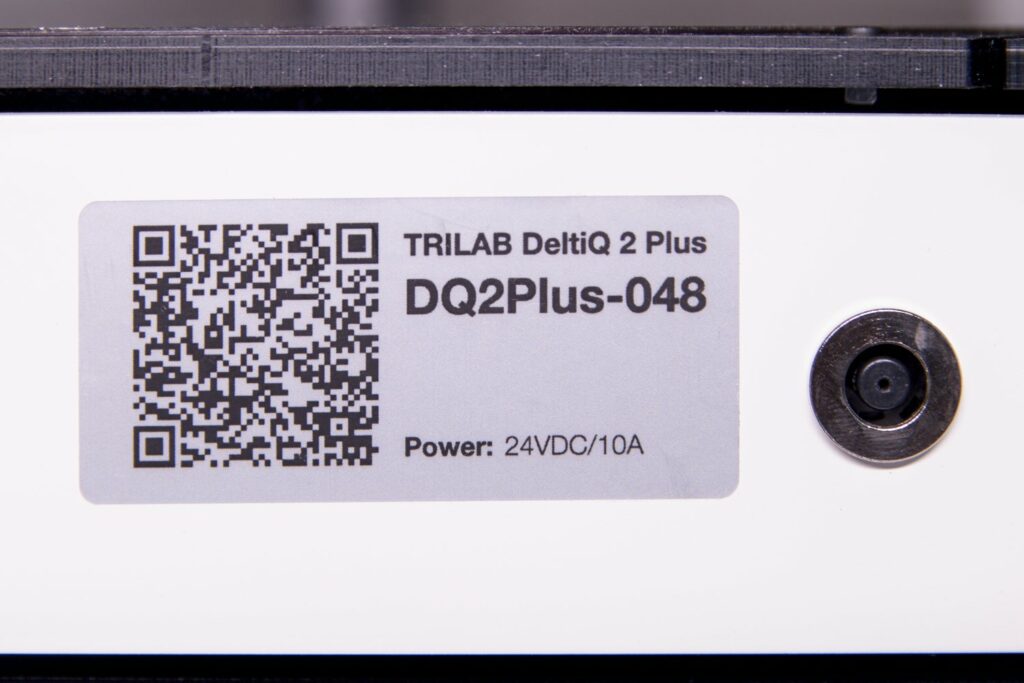
The printer is connected to the wireless display via Bluetooth. The printer can be paired with the DeltaControl application by scanning the QR label located on the bottom of the printer. More information can be found in following chapter.
You can also disconnect a connected printer directly from the DeltaControl (i.e. when you need to pair another device).
4.2) Connecting the printer to a computer network
The printer allows for several methods of connecting to a computer network. The following priorities are applied:
- Ethernet dongle – an accessory that enables connection of the standard RJ45 network cable via USB port. This connection has the highest priority. When used, the Wi-Fi interface is deactivated.
- Wi-Fidongle – an accessory that when connected to the printer’s USB port, allows you to connect to a wireless network in 2.4 GHz mode. Connecting to this accessory will disable the internal Wi-Fi device.
- Internal Wi-Fidevice – a basic connection method. In a noisy environment, it may result in a lower signal range, so it is advisable to replace it with a Wi-Fi dongle.
More information about connecting via Wi-Fi describes chapter: How to use the DeltaControl display and application.
Default settings according to the supplied accessories will be made, based on your needs during the first installation and handing over of the printer equipment.