
- Introduction – before you start using the printer
- Unpacking and installing the printer
- Getting to know the TRILAB AzteQ printer
- First printing with your AzteQ printer
- Cheat sheat – the usual printing procedure
- How to use the DeltaControl display and application
- How to use the WebControl online interface
- Printer self-installation
- Service tasks on the printer
Subchapters
1) Print head replacement…..2) Nozzle cleaning…..3) Nozzle replacement
1) Print head replacement
The whole print head can be replaced quite simply. This allows the user to have different print head configurations (e.g. different nozzle diameters) ready for use.
Note: Always replace the print head with the printer turned off and the filament removed.
Warning: Before you swap the printhead, make sure it is cooled down to room temperature sou you do not burn yourself.
Hold the print head with one hand and use your other hand to carefully disconnect all the arms from the magnets on the print head.
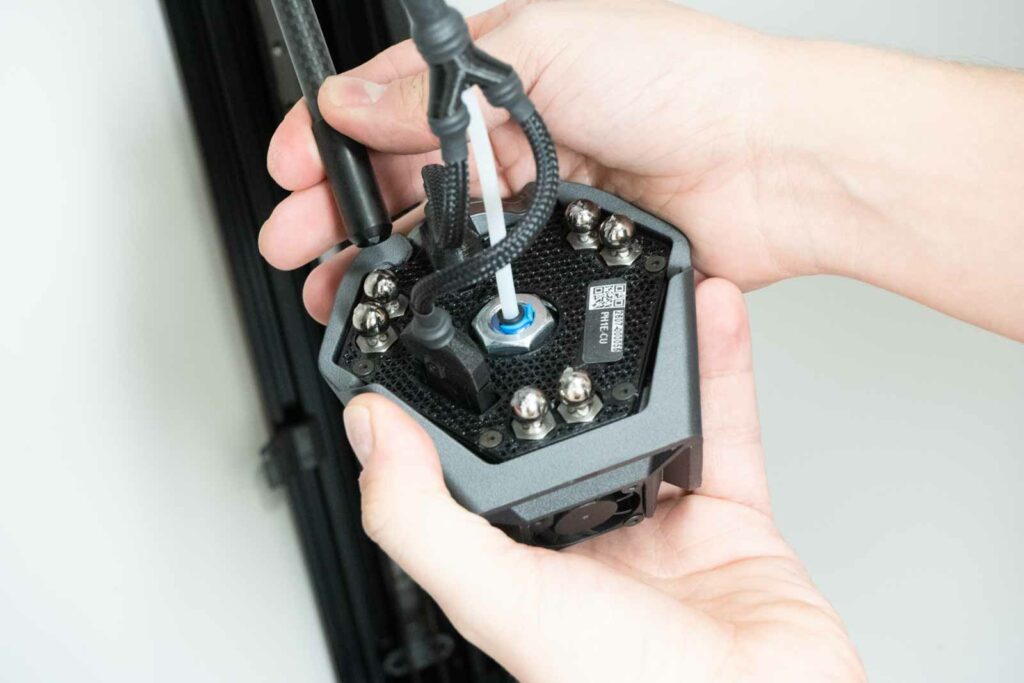
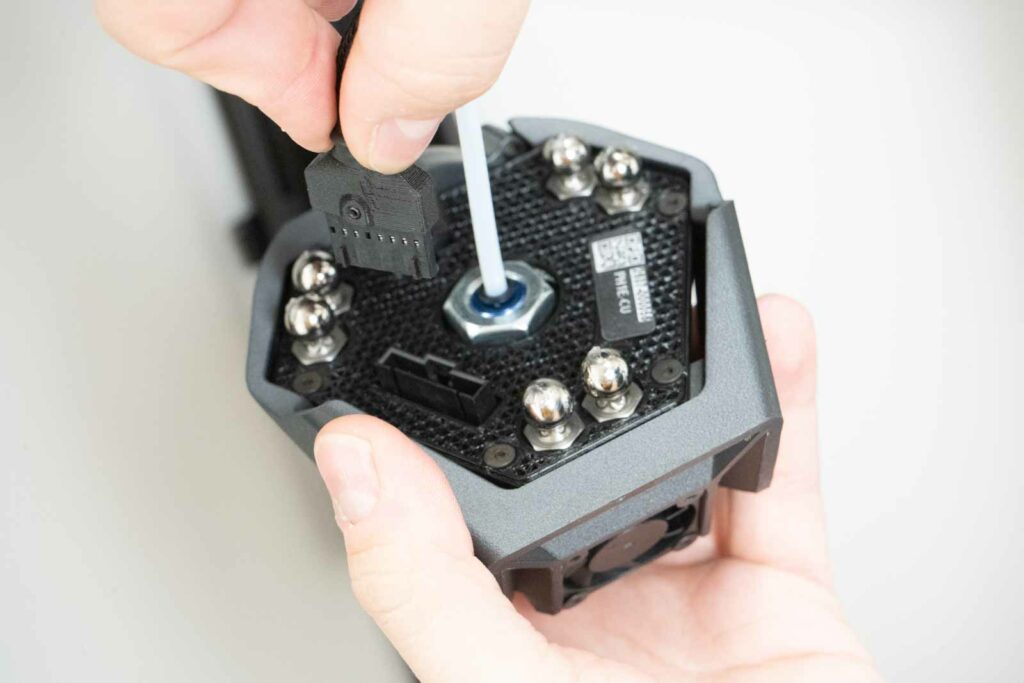
Then carefully disconnect the Bowden (take out the blue clip and push the black collet towards the printhead) and both connectors.
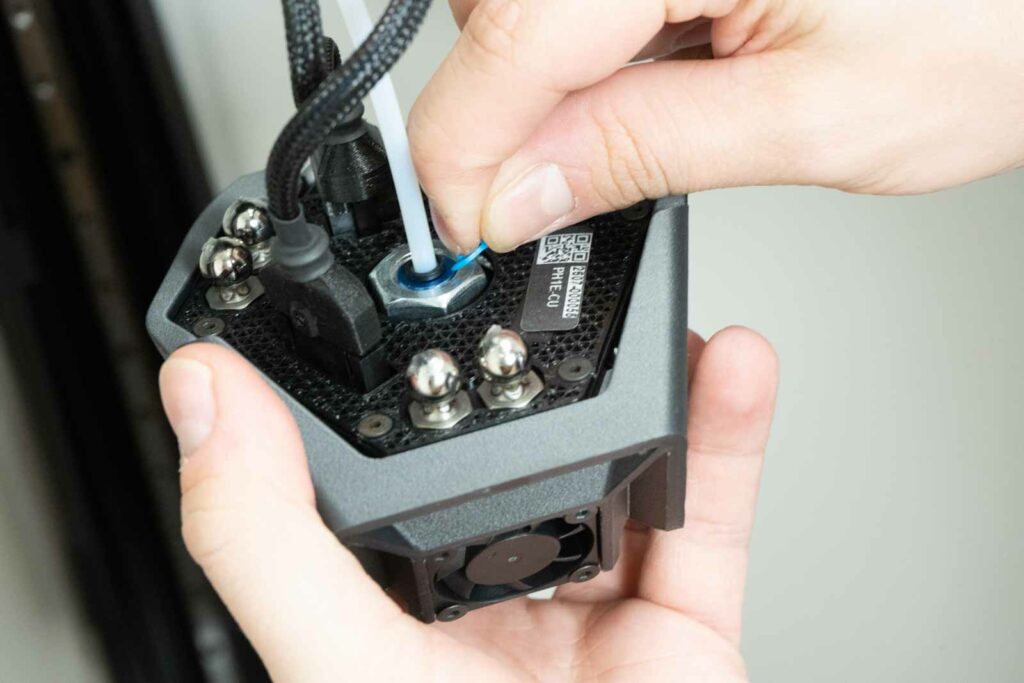

Note: Remember to plug-in the blue securing collar back on the print head to prevent it from getting lost.
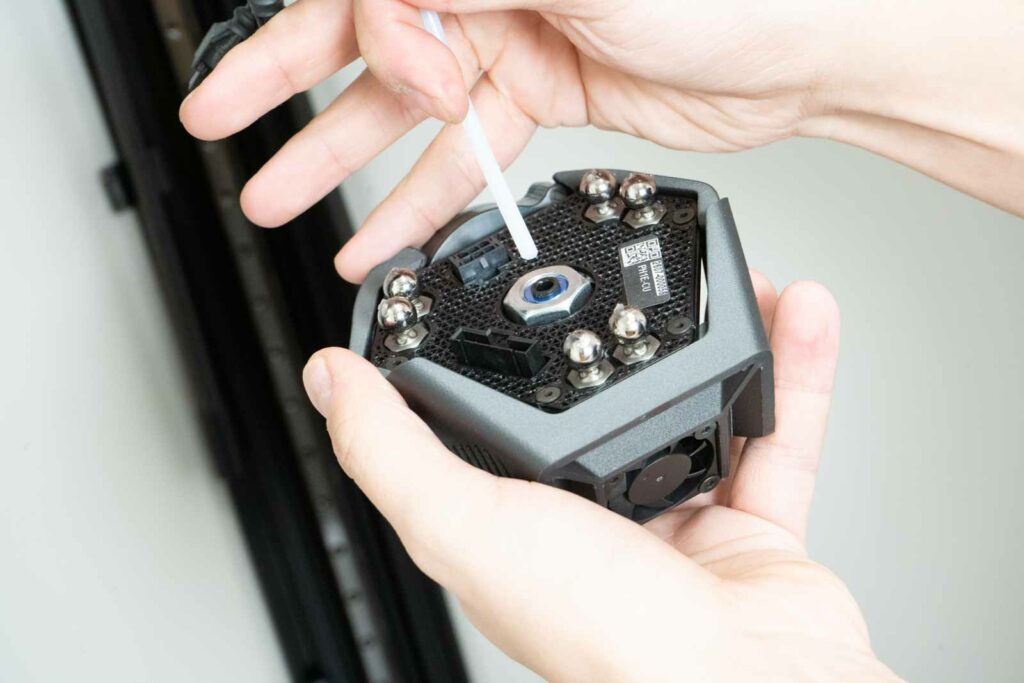
Remove the print head. The machine is ready for another print head to be installed. To install one, use this part of the instructions manual in reverse order.
Note: Please pay attention to the location of the cable harness during print head replacement. The cable harness must be placed between the rear pair and the right pair of arms.

After print head replacement software changes must be also made. You can use either DeltaControl or WebControl.
2) Nozzle cleaning (cold pull)
Note: Certain steps in this procedure must be done in close succession. Please make sure you read and understand the complete instructions manual beforehand.
If only small amounts of filament flow through the nozzle, the nozzle is probably clogged. It can be cleaned using the “cold pull” method. This method takes advantage of the filament solidifying partially in the nozzle – after the filament is pulled out, it takes out with it any impurities that have stuck to it.
Preprare pliers and about 50 cm of light-coloured PLA filament (which allows you to see perfectly all impurities pulled out of the nozzle).
If there is any filament in the print head, remove it.
- Release the filament Bowden attachment in the print head.
- Use the online control interface or DeltaControl display to heat the nozzle to 210°C (or more, depending on the previously used material).
- Cut the end of the 50cm piece of filament at a 45° angle and straighten the last 10cm.
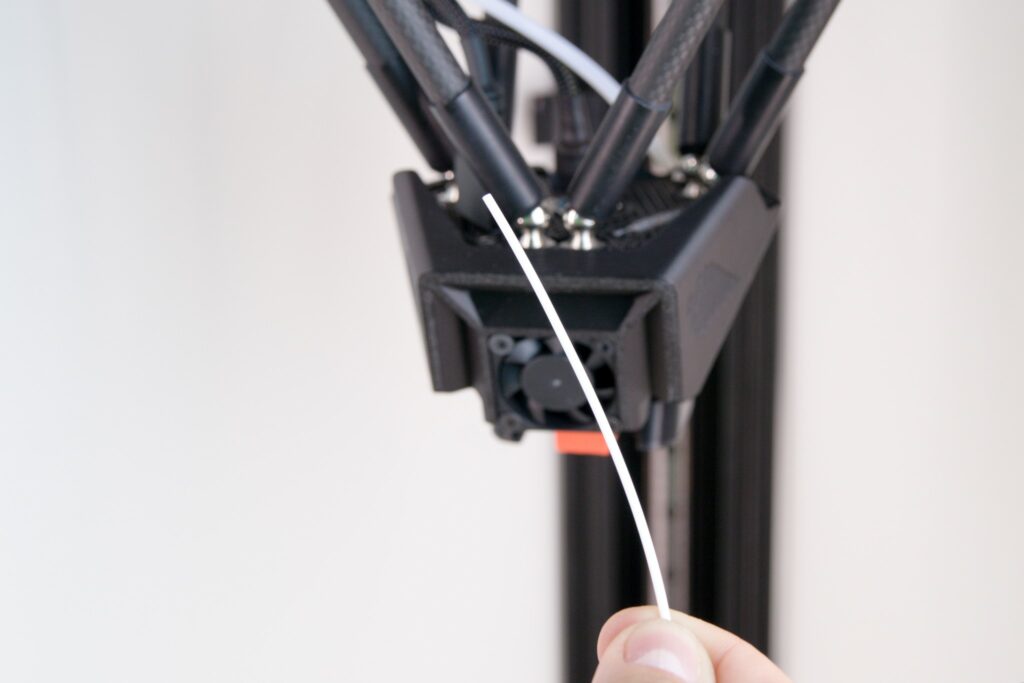
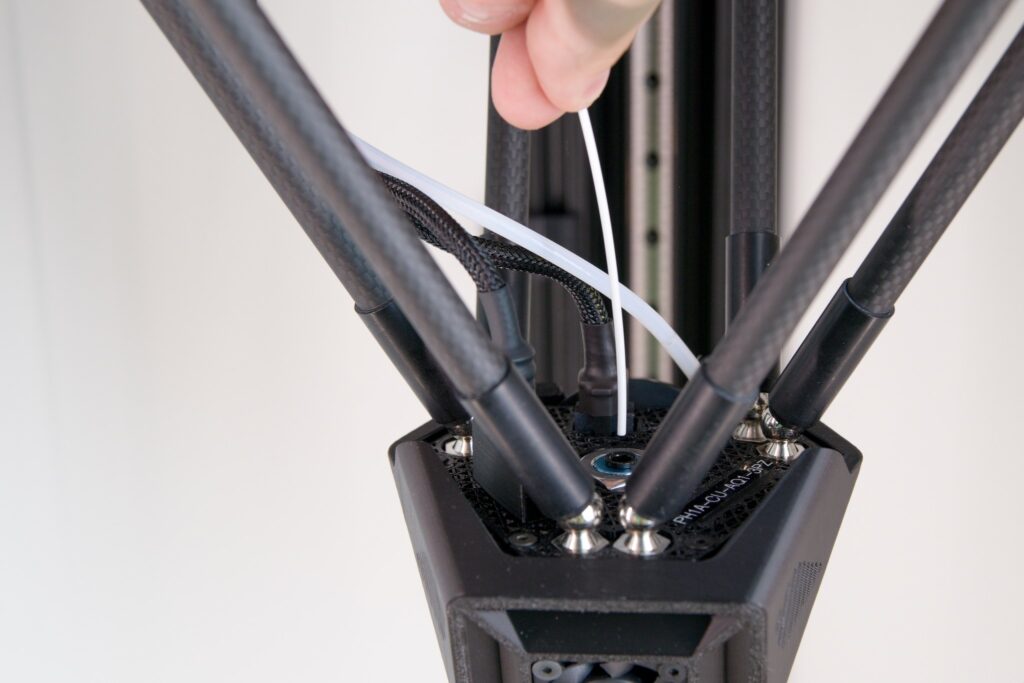
Once the nozzle has reached the desired temperature, insert the cut piece of filament into the print head. Melted filament should start flowing out of the nozzle.
Tip: If no filament flows out of the nozzle, the nozzle is likely to be clogged and the cold pull method will probably not work. In such a case we recommend replacing the nozzle with a new one.
Note: While inserting the filament and during the following steps, hold the print head with one hand to prevent it from moving – abrupt print head movement might cause damage to the printer’s electronic parts. Also, proceed carefully so as not to burn yourself.
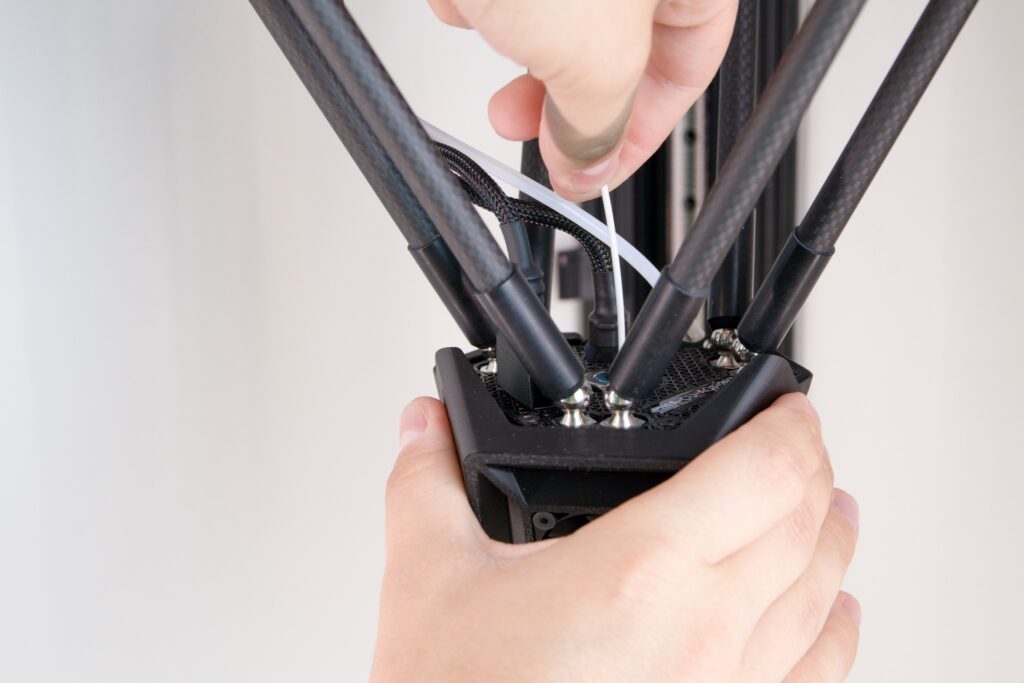
Using the DeltaControl display or the web interface again, enter the command to decrease nozzle temperature to 90 °C. Before the temperature drops below 160 °C, push the filament gently but constantly into the print head.
As soon as the temperature has dropped to 90 °C – and the filament in the nozzle is relatively solid but still slightly plasticized – grasp the loose end of the filament with one hand, holding the print head with your other hand, and move your hand (holding the filament) quickly upwards to pull the filament out of the print head.

Note: At this moment, do not leave the filament in the nozzle for longer than necessary and continue immediately.
Check the filament part that you have pulled out of the nozzle. If the procedure has been done correctly, impurities from the nozzle may be visible at the end of the filament. The impression of the inner shape of the nozzle should also be visible.
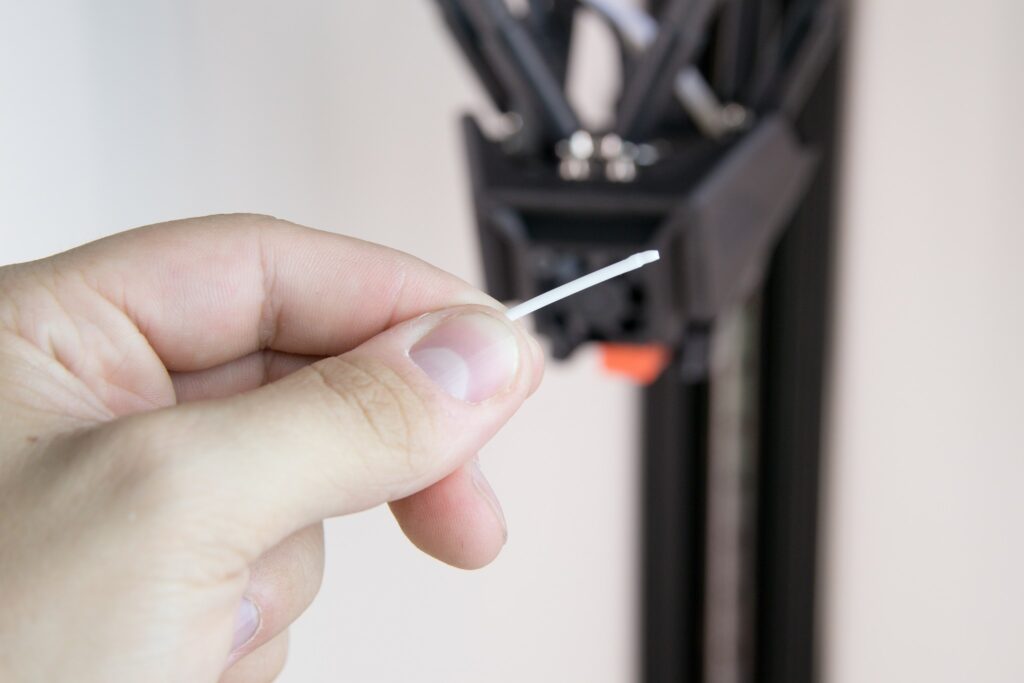
We recommend repeating the whole nozzle cleaning procedure for best efficiency.
Once the nozzle has been cleared, reinsert the Bowden line into the print head and secure it with the blue collar.
3) Nozzle replacement
The nozzle replacement procedure is simple but it must be done at temperatures as high as 300°C. Therefore, proceed with extreme caution and make sure you read and understand all the instructions. If not sure, please contact our service department. Before you start following the procedure below, pull the filament out of the print head – macro command Unload filament.
- Prepare a replacement nozzle, a torque wrench and adjustable wrench or a pair of adjustable pliers.
- Make sure the print head has cooled down below 50 °C (status indicator light is white) – if not, cool it down.
- Remove the blower, the only access is from below between the heatblock and its fan.
- Remove the blower by pulling it carefully downwards while holding the print head with your other hand.
- Remove the hotend silicon sleeve (watch the cables leading to the heating unit and thermistor).
- Heat the print head to 300°C
- Lock the heatblock (aluminium block) with the adjustable wrench and use the torque wrench to unscrew the nozzle.
- Cool the print head to 50°C.
- Using your fingers to screw in the new nozzle.
- Heat the print head to 300°C
- Use the adjustable wrench to lock the heatblock and then tighten the nozzle with the torque wrench – the wrench must click at least three times.
- Cool the print head to 50°C.
- Make sure the hotend is not partially turned and does not touch any plastic parts.
- Re-install the heatblock plastic cover.
- Re-install and screw on the fan (see point 3).
- In Settings tick the advanced settings option.

- Make sure the nozzle has cooled down below 50 °C.
- Enter the following set of commands in Machine Control: M303 H1 S220 (the program is not case sensitive), press Send and wait for confirmation saying that temperature calibration has been performed successfully – Auto tune heater 1 completed. This process usually takes 5 or 6 minutes.
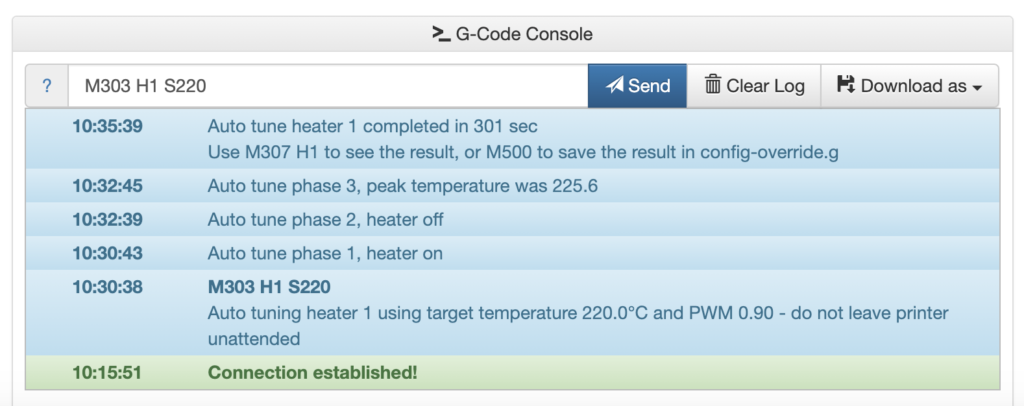
Note: During temperature calibration, the nozzle is heated to more than 220 °C, so be very careful with regard to your personal safety. Also, do not perform any other operations, otherwise, the calibration will not be performed properly.
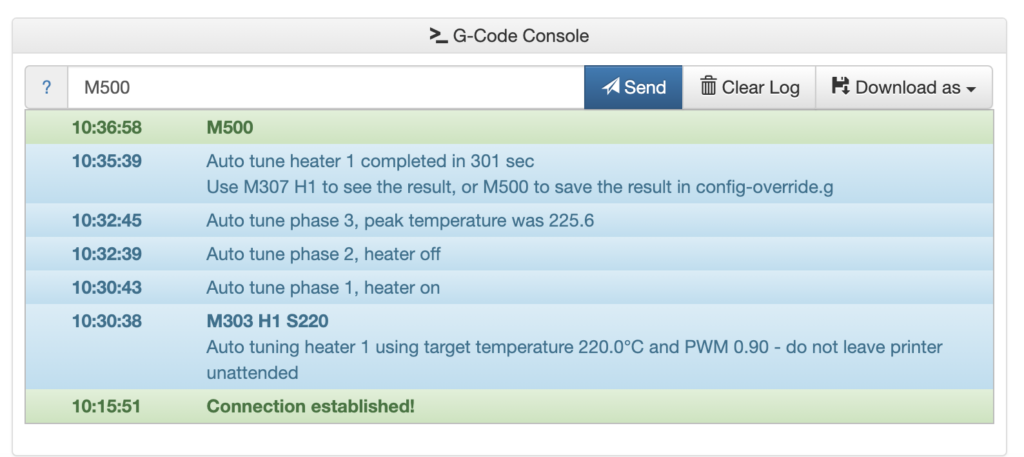
- Save the calibration results by entering the command M500 and clicking Send
- Zero the Z offset and set the correct First layer height.